PLA LW AERO and TPU Flex LW – the art of reducing print weight
:fill(white)/37c42219dee999c1ba74a5118f5e890e)
3D printers are amazing – not only do they save the day in everyday emergencies, but they also help you pursue your passions. A custom drone part? A piece of cosplay armor? Or maybe a lightweight airplane model? For all creators at heart, we’ve got something special – PLA LW AERO and TPU Flex LW.
These are filaments that can work wonders. Thanks to a special formula, prints can be up to 2.5 times lighter while maintaining the same dimensions. How is that possible? These materials foam during printing, which means they slightly expand as they are printed, creating a porous structure. The result? Not only ultra-lightweight parts, but also nearly invisible layer lines — the finished print looks more like a cast object than a printed one.
LW-type filaments are an ideal choice for fans of remote-controlled flying models, where every gram matters. They also work great for creating cosplay props, lightweight decorations, or creative DIY projects.
All you need to do is properly set the flow rate (the amount of filament fed during printing), and you’re ready to go — let your ideas take flight! In the rest of the article, you’ll find simple tips on how to do it step by step.
So if you want your projects to be feather-light, look professional, and make a real impression – reach for PLA LW AERO and TPU Flex LW. These are filaments that can truly lift your ideas to next level!
When should you choose foaming PLA and when TPU?
If you need rigid prints, PLA LW will be the best choice. Foamed TPU is designed for more specialized applications. Thanks to its foamed structure, TPU becomes even softer. The final effect depends on how thick the parts are and what infill they have.
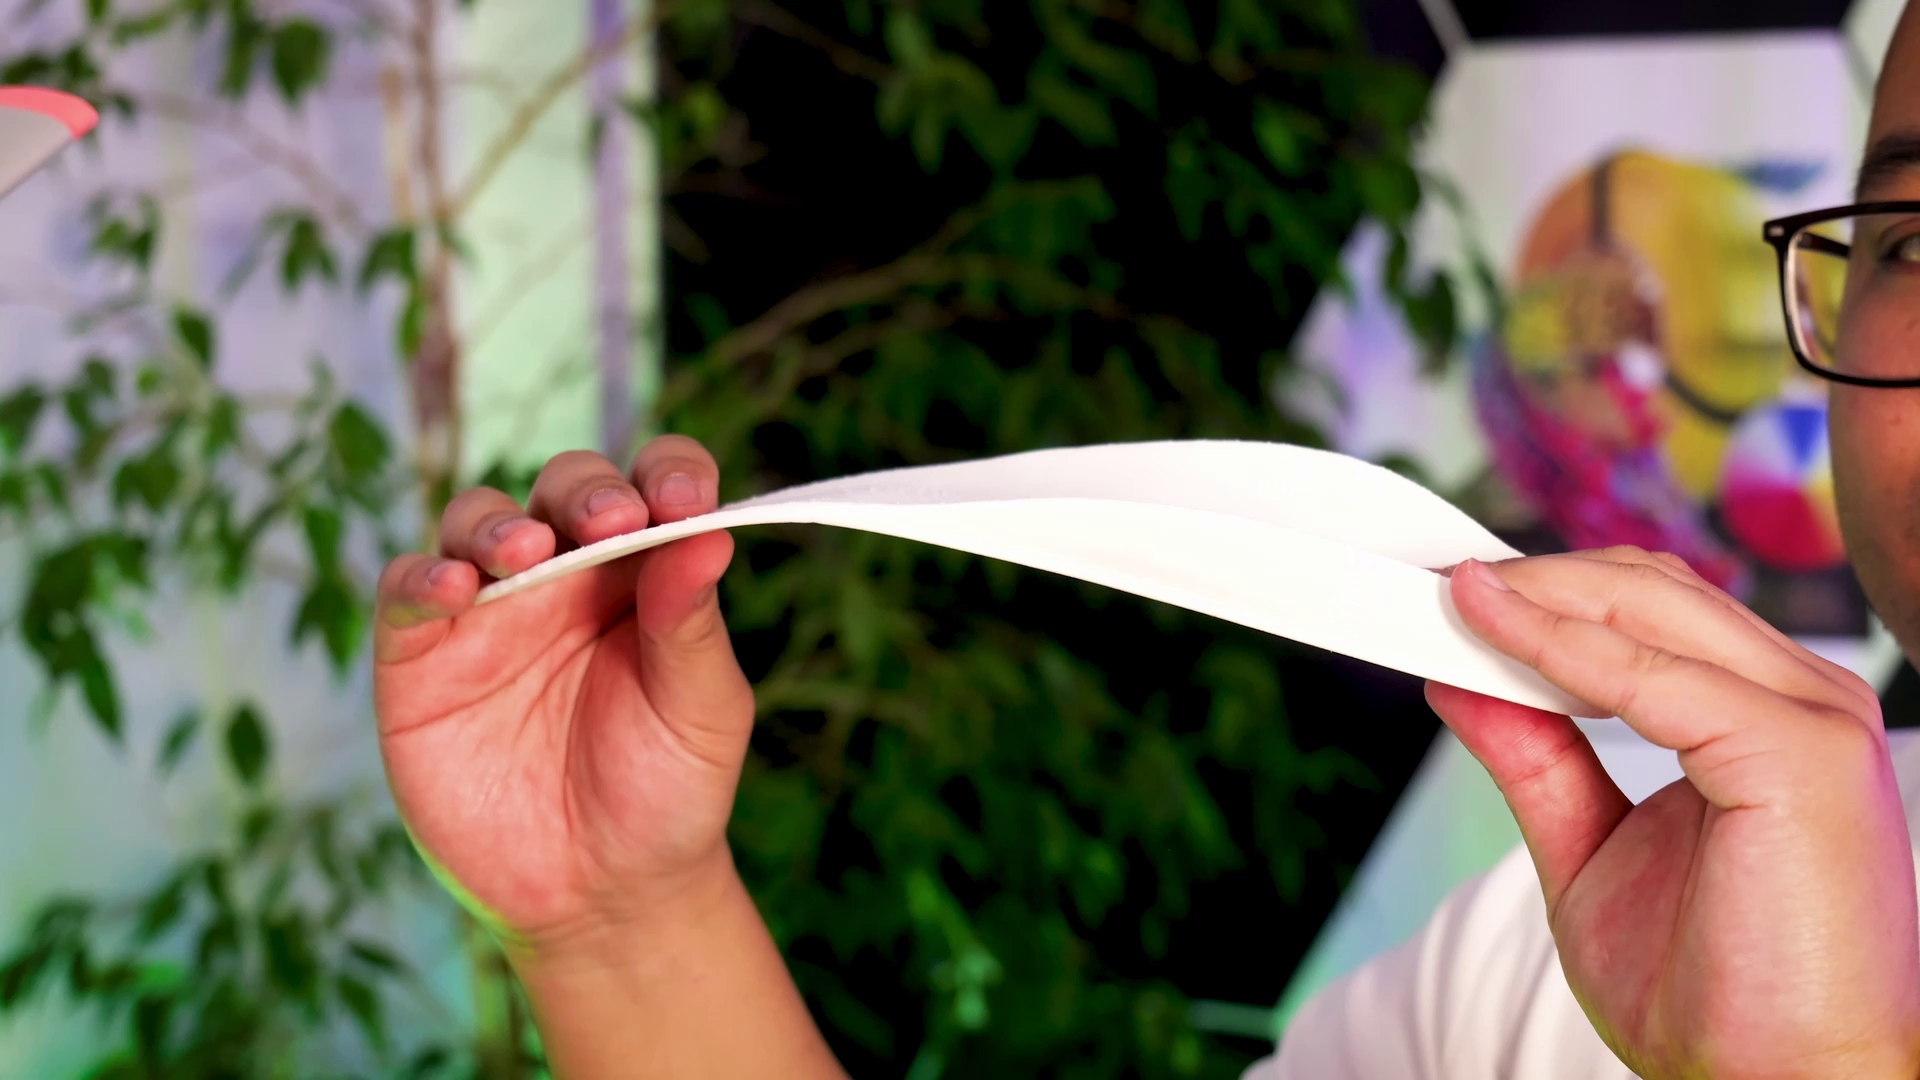
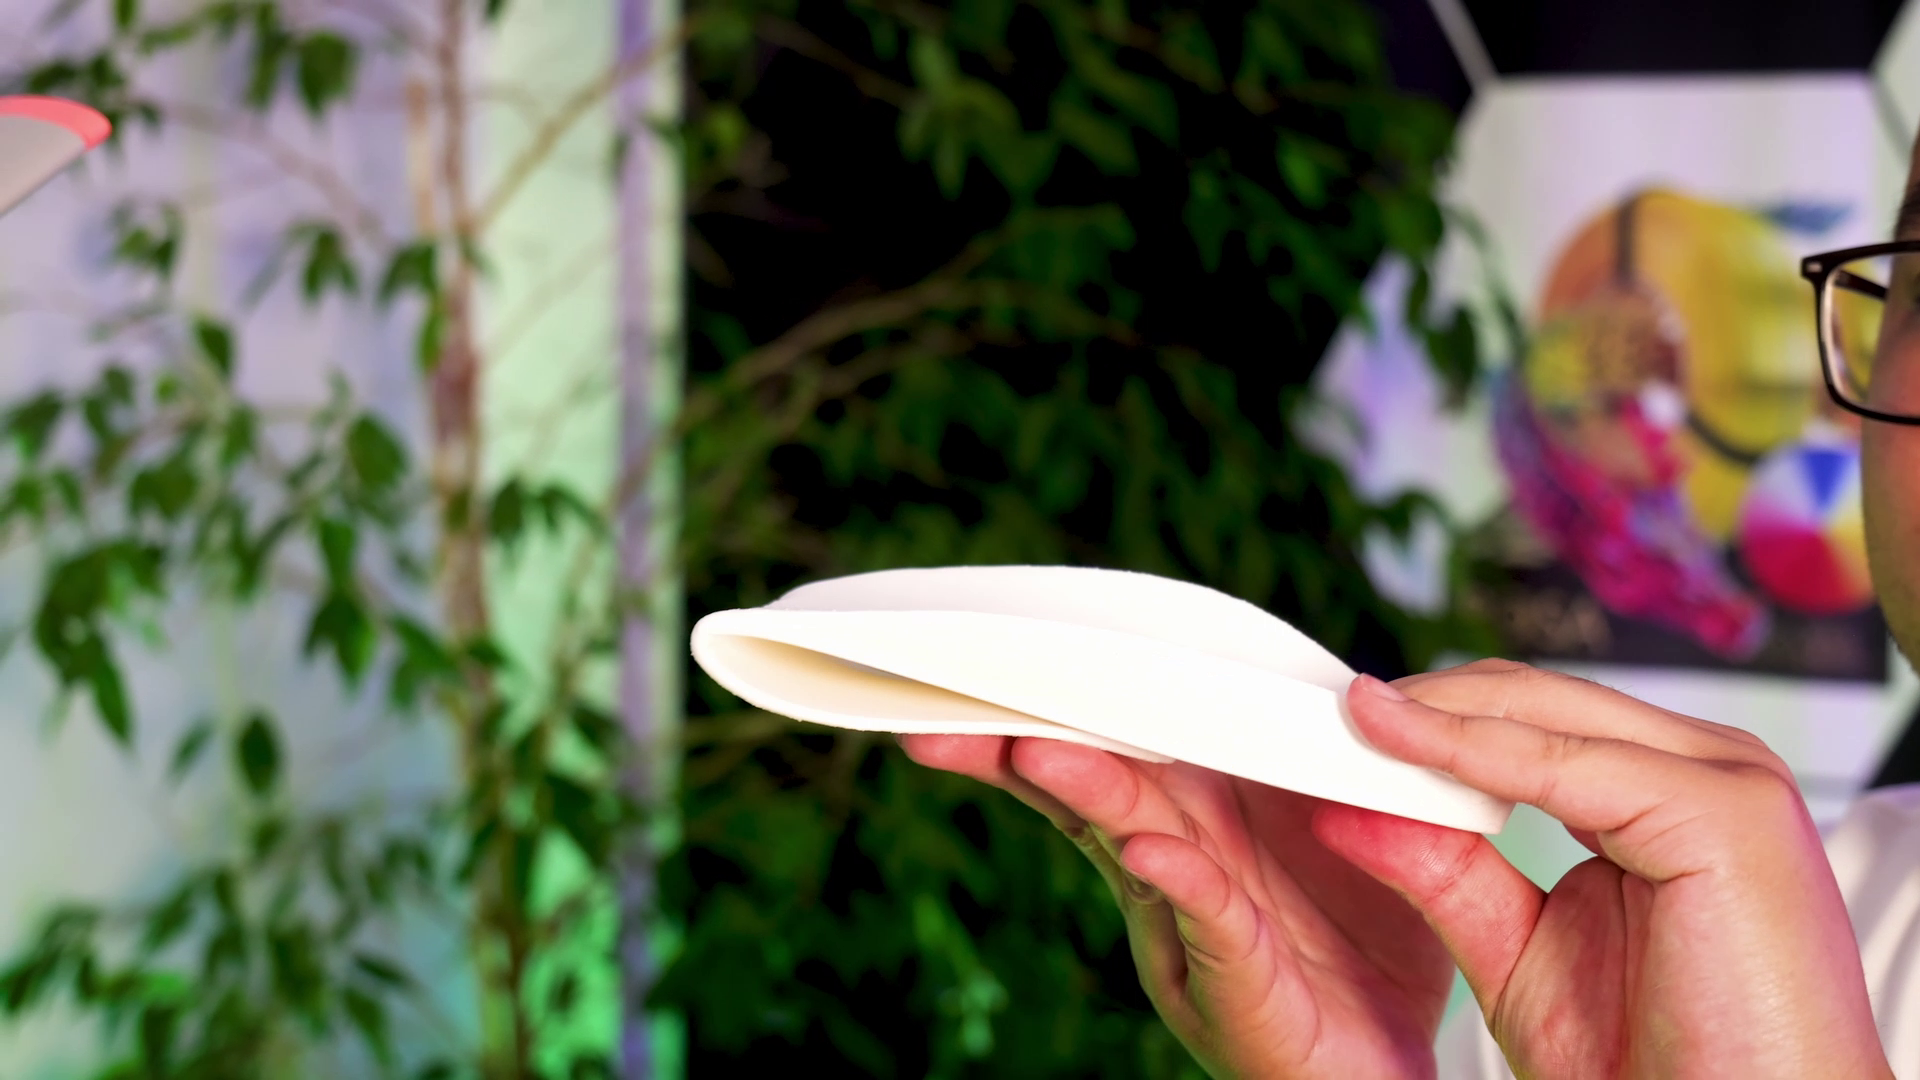
TPU Flex LW White – insole before bending and after bending.
What can you use PLA LW AERO for?
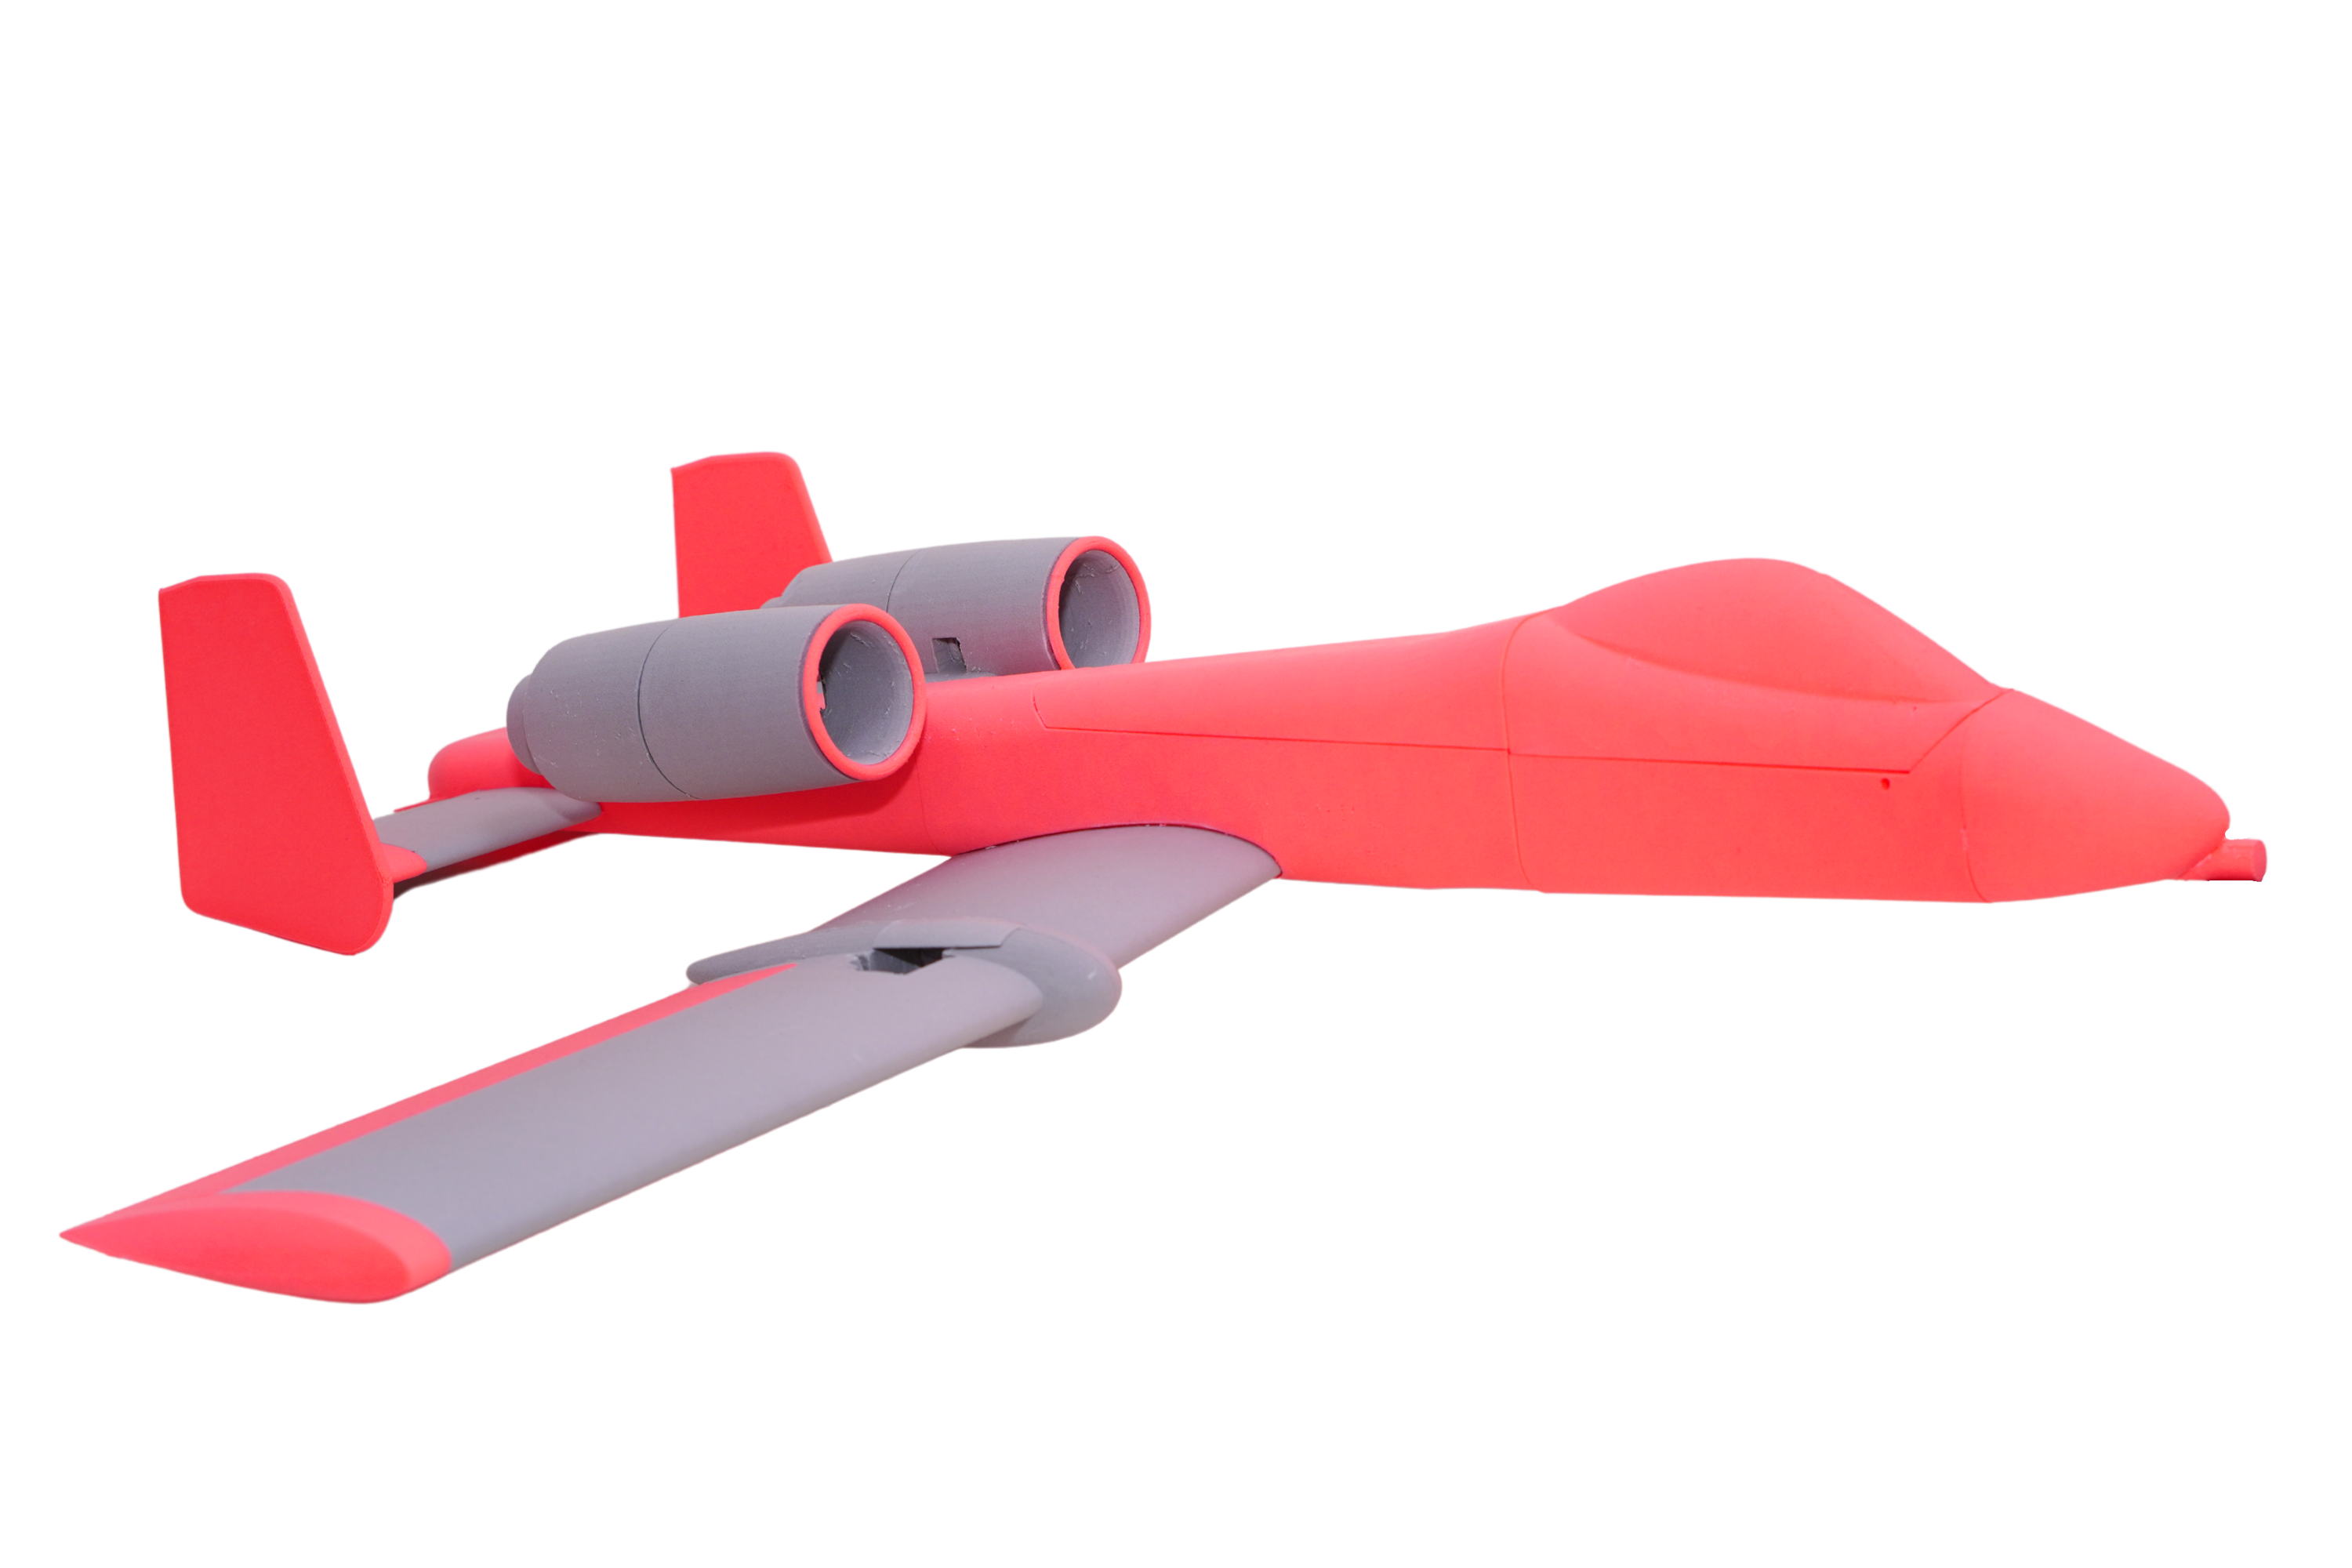
PLA LW AERO Neon Orange i Gray.
This filament truly shines when lightweight and appearance are key! Its foamed structure makes the layers almost invisible, and the surface is perfect for painting, sanding, or other post-processing. It opens up a world of possibilities for hobbyists and makers!
It’s perfect for applications such as:
• RC airplanes and drones – every gram saved means longer flight time and better maneuverability,
• hand-launch models – lightweight and durable, ideal for fun and aerodynamic testing,
• electronics enclosures and RC builds – when weight truly matters,
• cosplay costumes – large, eye-catching armor pieces or accessories won’t weigh you down after a few minutes of wearing,
• props for films and photoshoots – fast printing, low weight, easy to paint – what more could you want?
What can you use TPU Flex LW for?
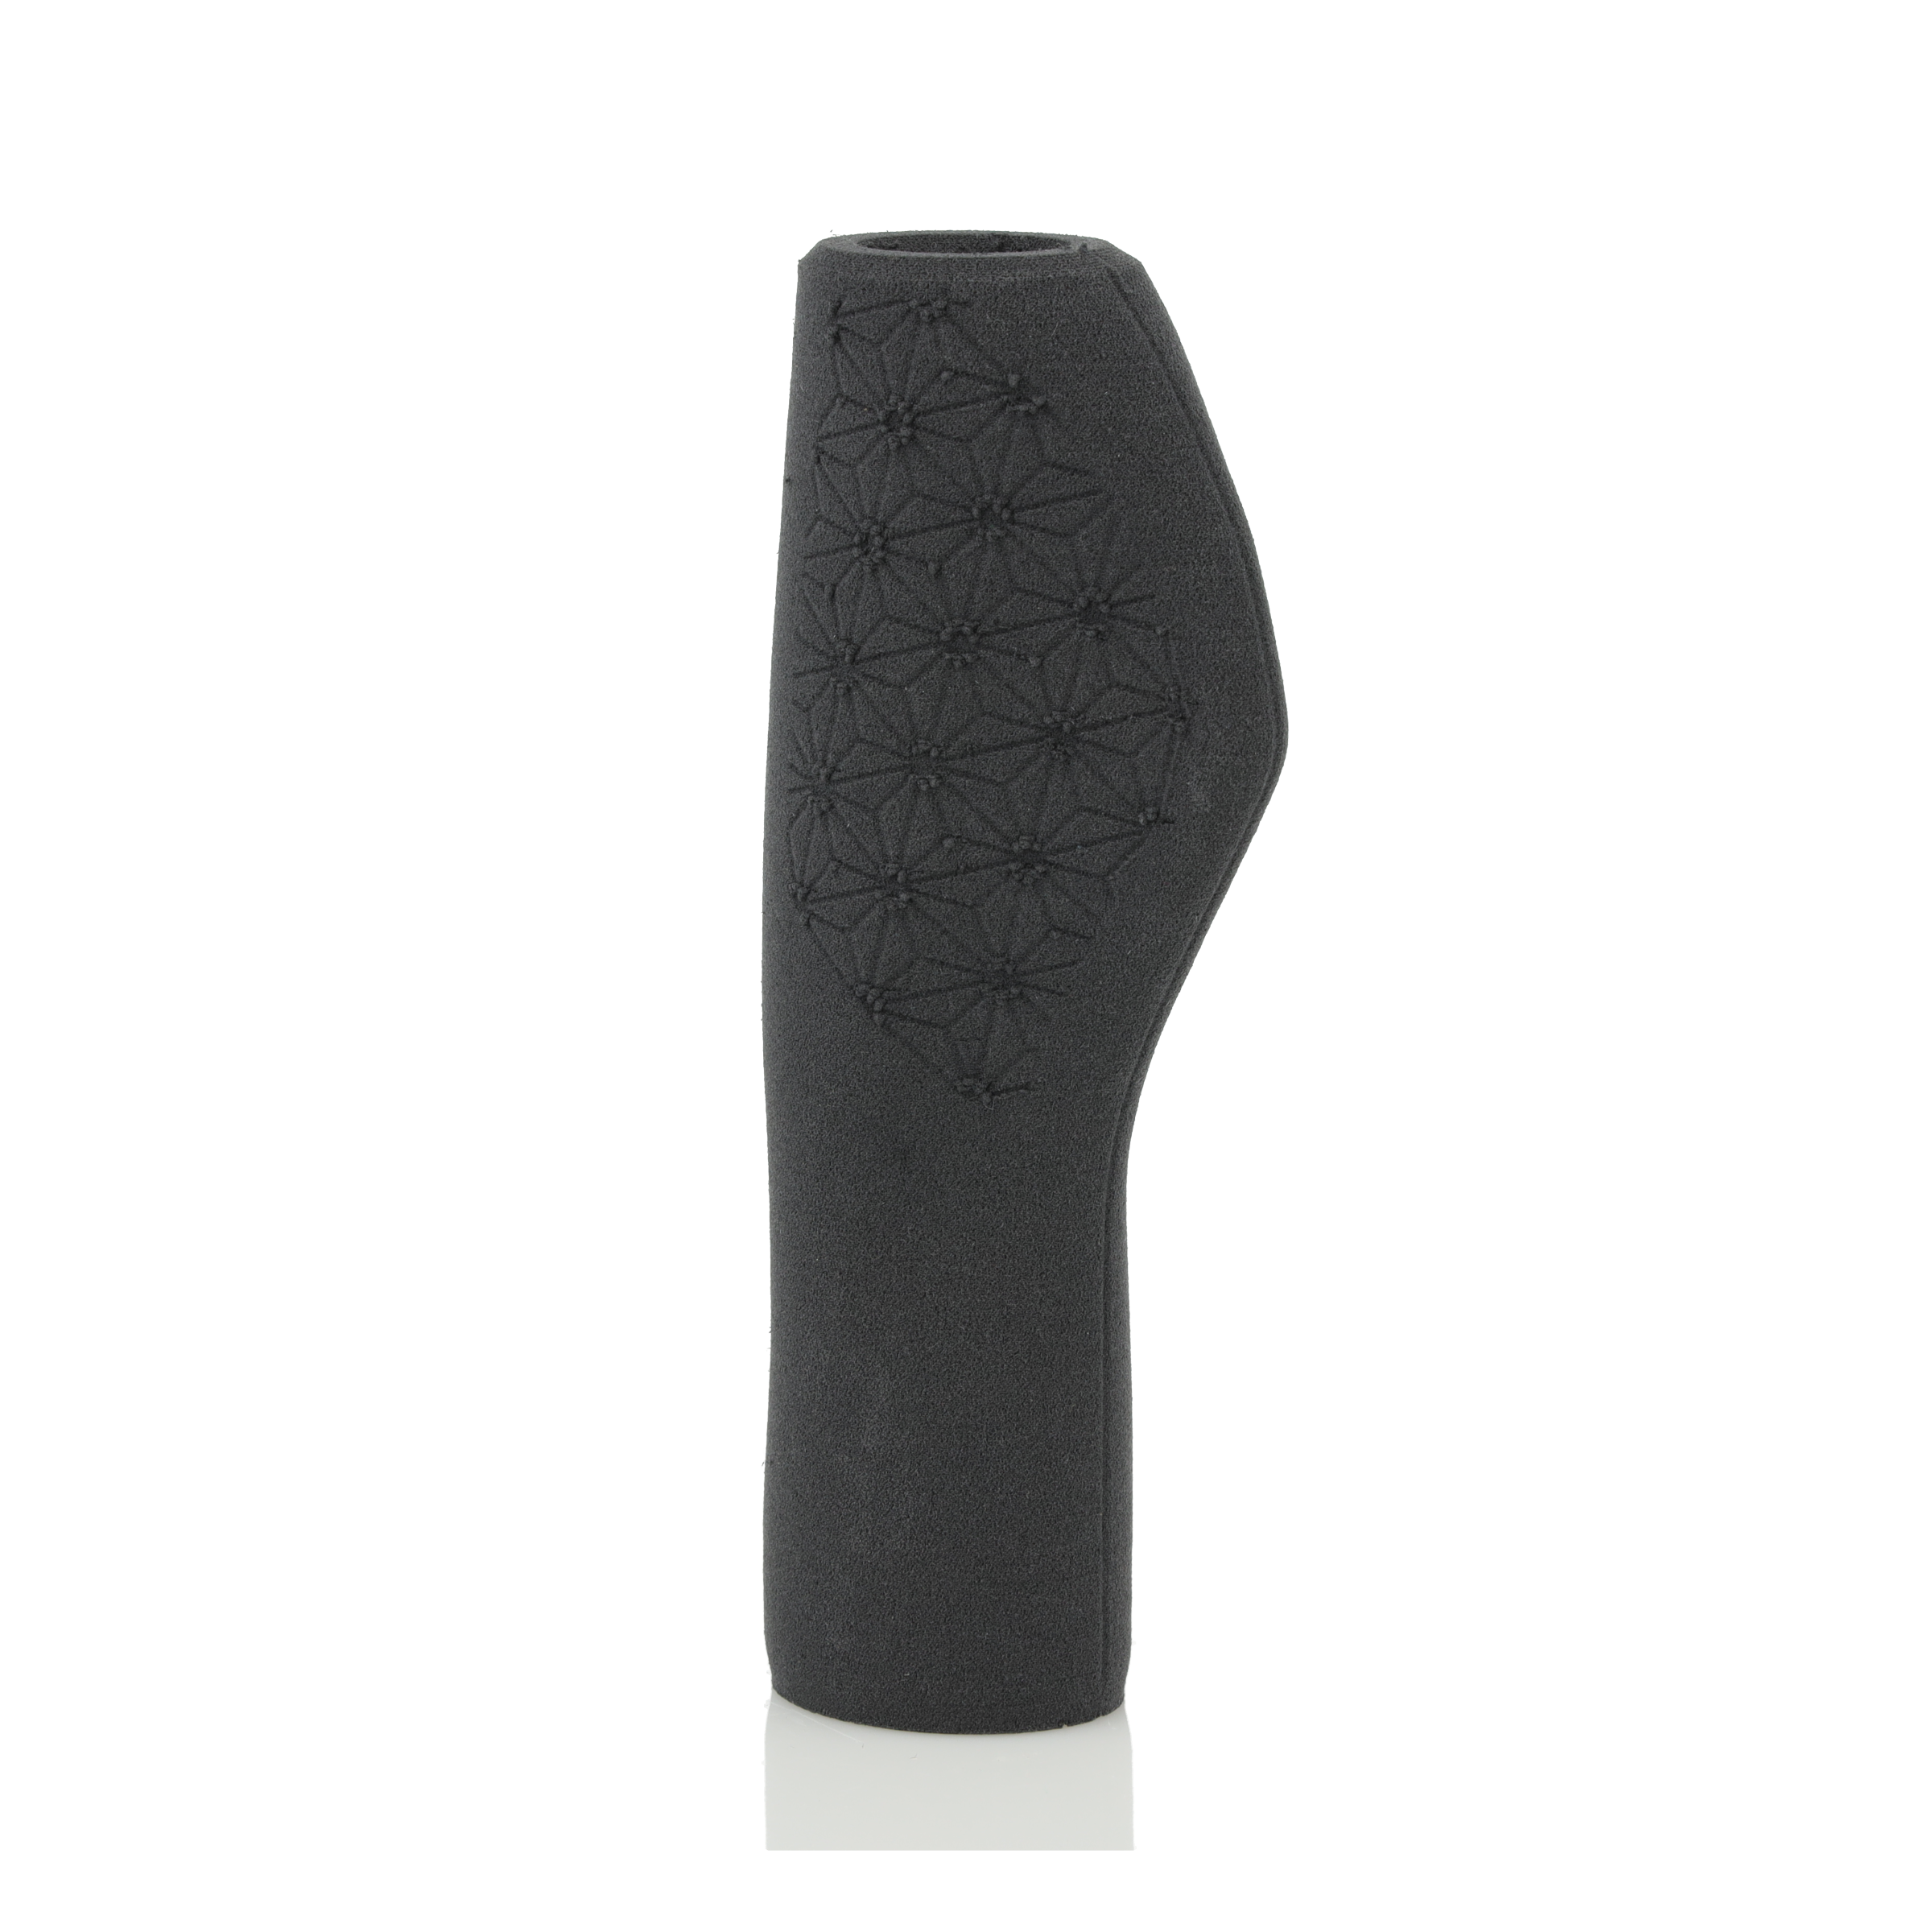
TPU Flex LW Gray.
TPU Flex LW is a material designed for projects where low weight, flexibility, and cushioning are essential, and where standard TPU is either too heavy or not flexible enough.
It’s perfect for applications such as:
• cushioning and protective elements,
• seals, grips, handles,
• RC components, drones, and aircraft models,
• insoles, pads, ergonomic elements.
And that’s just the beginning! If you’ve got an idea for something big, light, and unique – this material won’t let you down.
Description and calibration
PLA LW AERO is primarily composed of polylactide (known for its user-friendly printing) and a foaming agent. The foaming effect is controlled by adjusting the temperature, and in our material, it begins at around 220 °C. This expansion not only reduces the overall weight of the print but also gives it a slightly rough, textured surface that effectively hides layer lines. Additionally, the foamed filament is easier to post-process — prints can be easily cut and sanded.
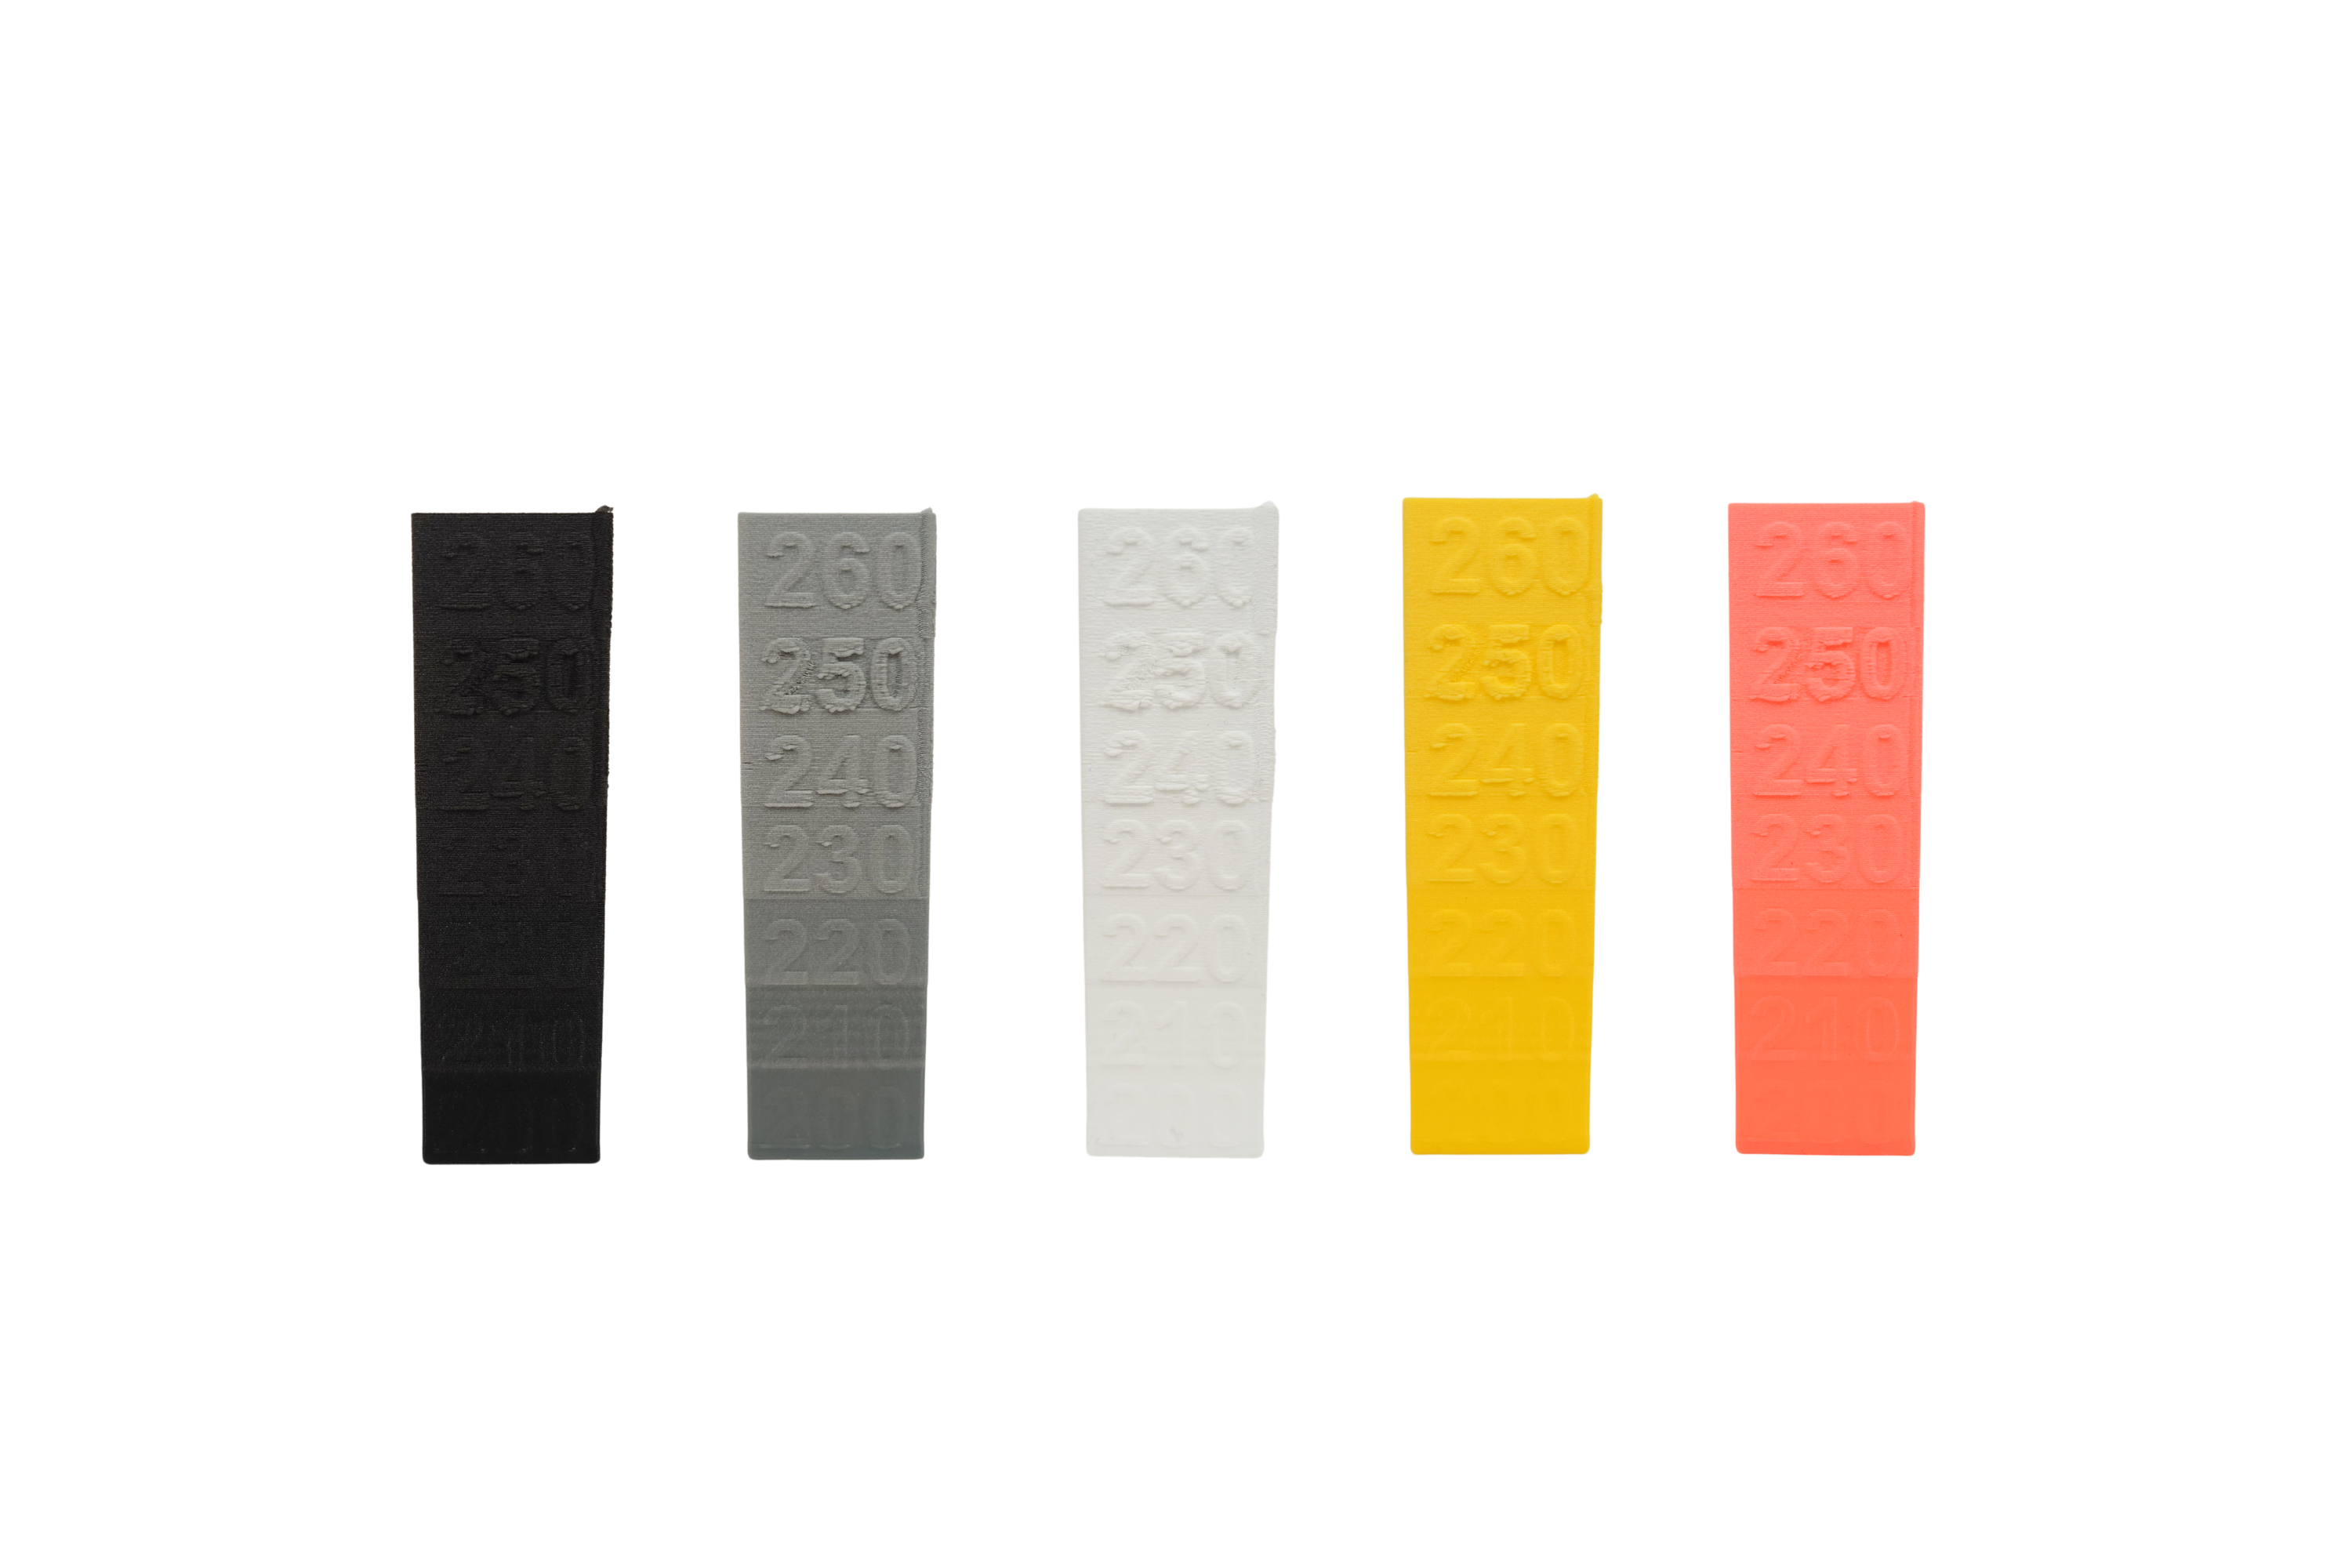
Color comparison of PLA LW AERO: Black, Gray, White, Yellow, and Neon Orange.
| Printing parameters | ||||
| Nozzle temperature [°C] | 220 – 250 | |||
|---|---|---|---|---|
| Bed temperature [°C] | 40 – 60 | |||
| Printing speed [mm/s] | 5 – 60 | |||
| Cooling fan speed [%] | 0 – 20 | |||
| Enclosed chamber | No | |||
| Nozzle type | brass/steel | |||
TPU Flex LW is an advanced flexible filament that actively foams during printing, allowing you to create lightweight, soft, and resilient prints without losing strength and while maintaining very good layer adhesion. The foaming effect can be achieved starting at 220 °C.
| Printing parameters | ||||
| Nozzle temperature [°C] | 220 – 260 | |||
|---|---|---|---|---|
| Temperatura stołu [°C] | 30 – 60 | |||
| Printing speed [mm/s] | 5 – 60 | |||
| Cooling fan speed [%] | 0 – 20 | |||
| Enclosed chamber | No | |||
| Nozzle type | brass/steel | |||
The foaming efficiency will vary from one printer to another, mainly depending on the hotend design. According to our tests conducted on various printers, PLA LW AERO shows the strongest foaming effect at temperatures between 240 and 250 °C. For this temperature range, the extrusion multiplier should be set to around 0.4. A similar effect can be observed with TPU Flex LW. The strongest foaming occurs at a temperature of around 260 °C. For this temperature, the extrusion multiplier should also be set to approximately 0.4.
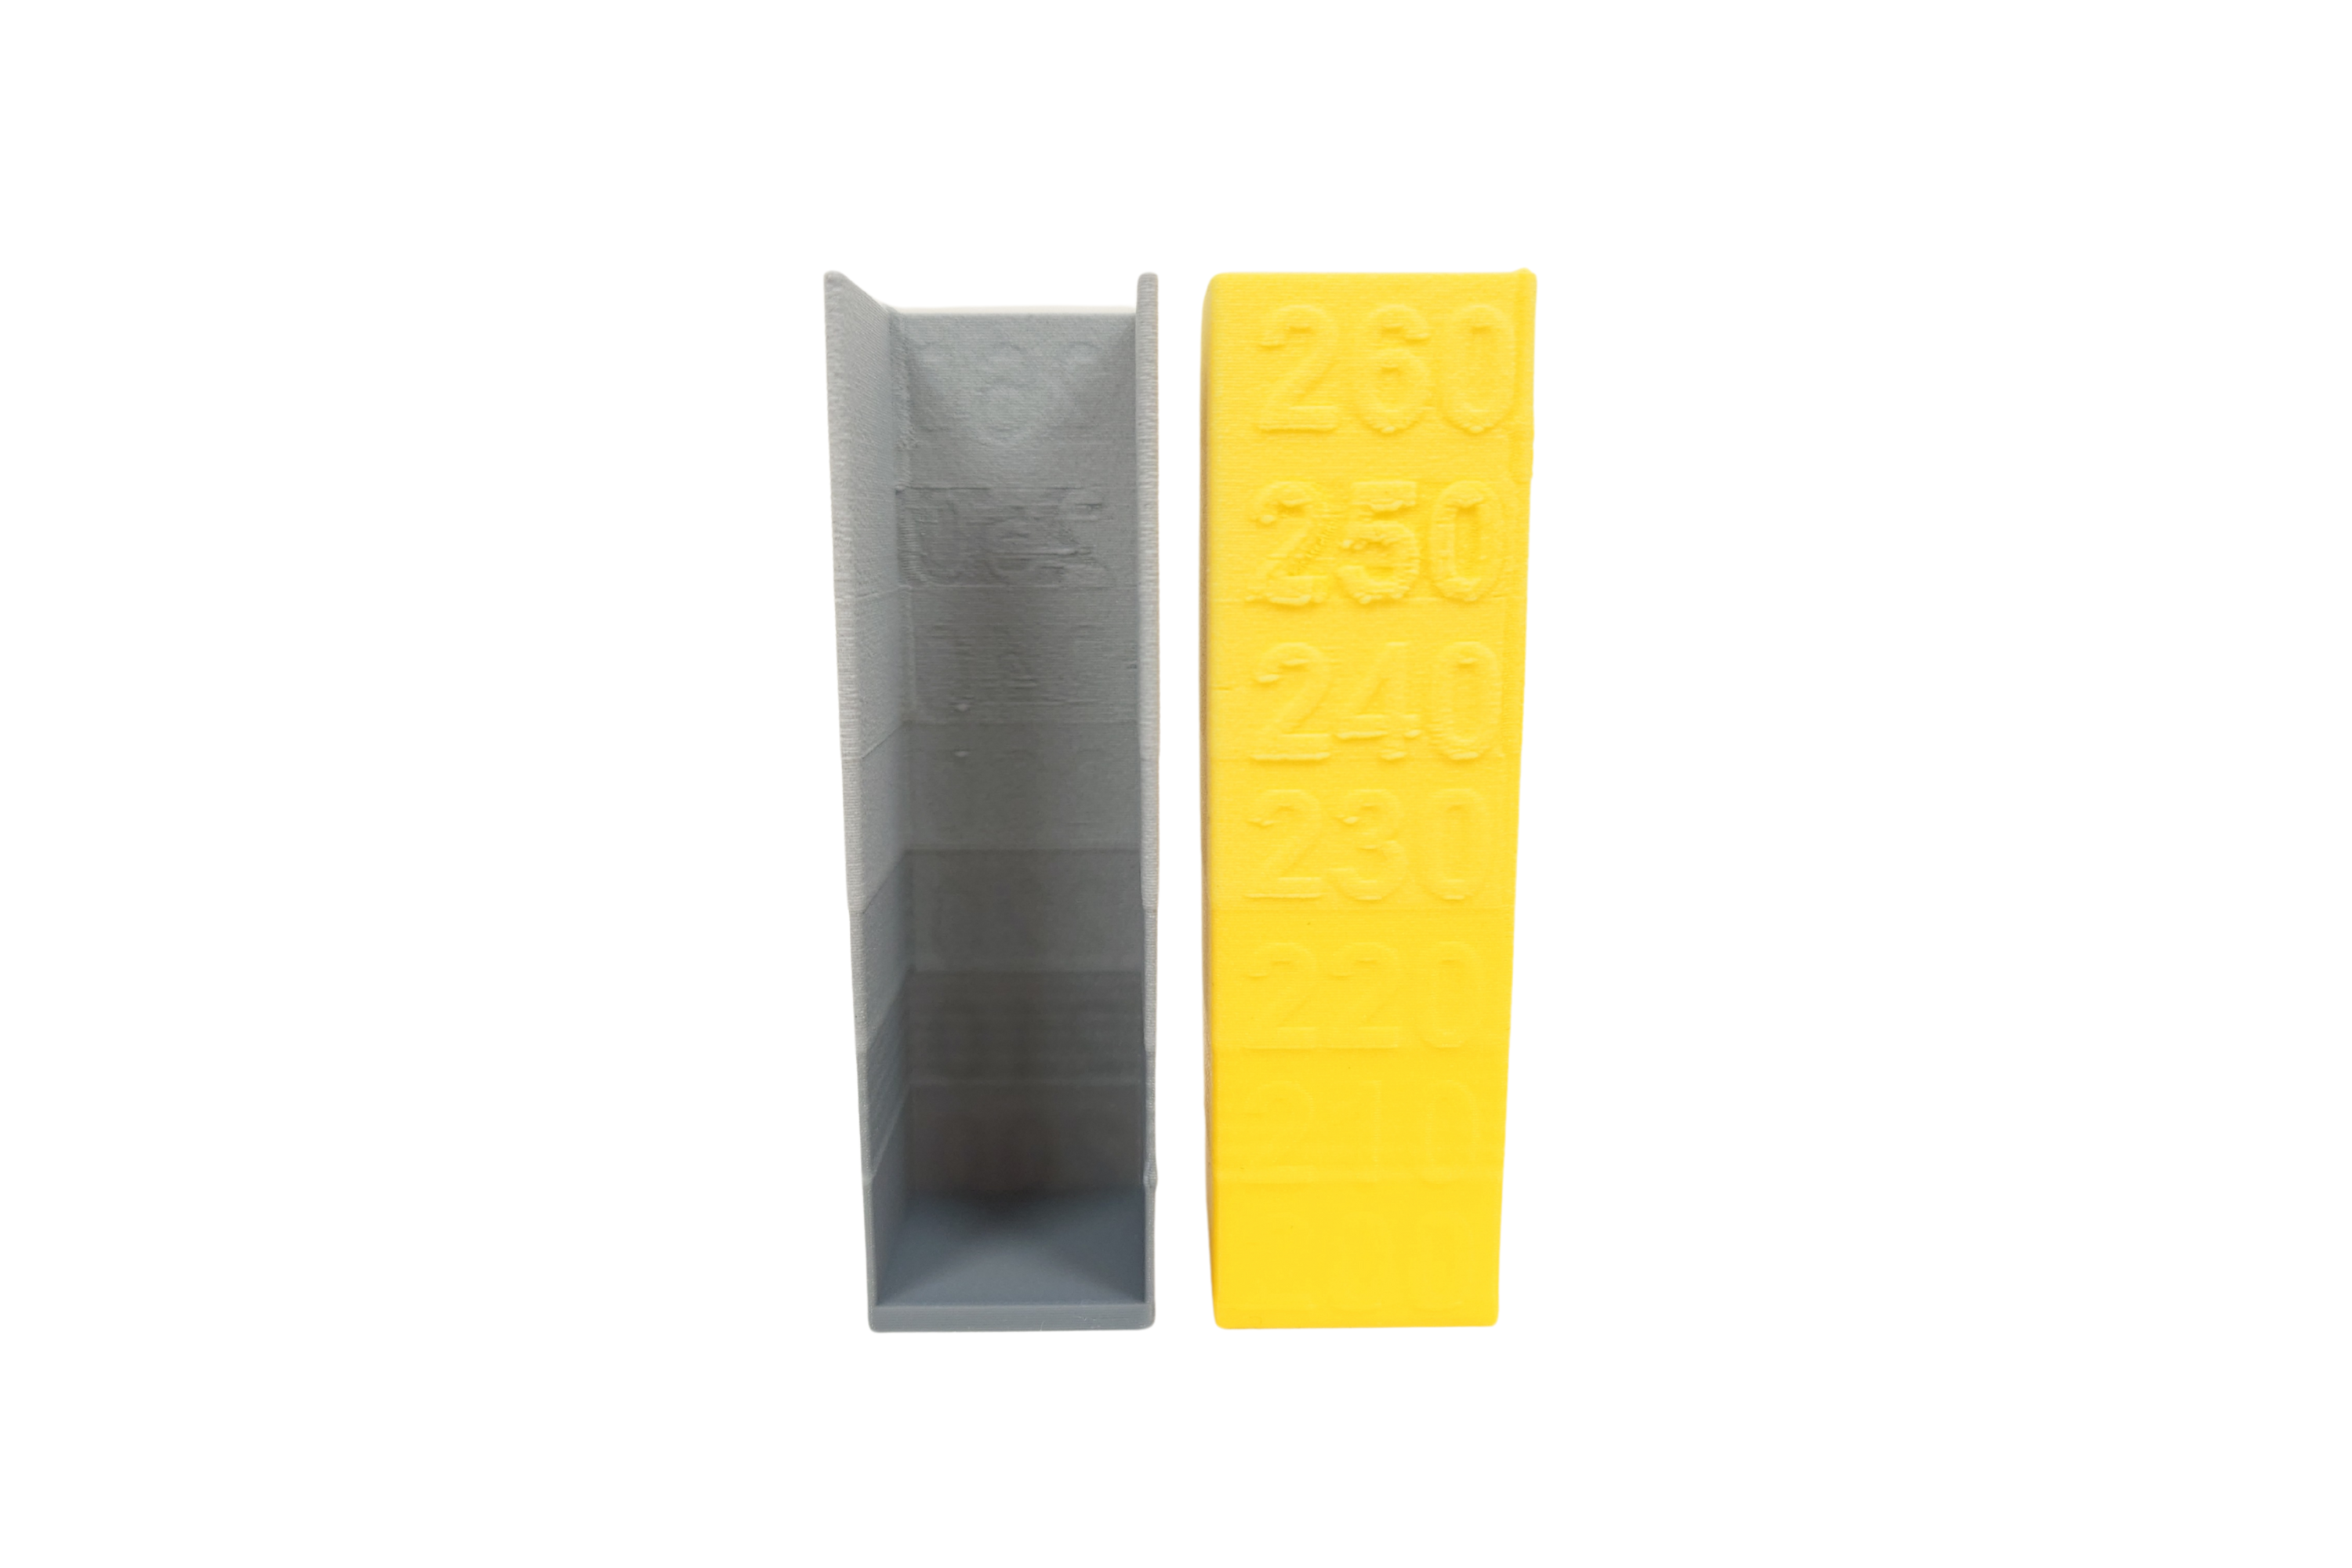
Change in wall thickness in LW-type filaments depending on temperature.
For best results, we recommend calibrating the flow rate yourself at different temperatures within the 220–260 °C range. A caliper will be an essential tool for this process. In PrusaSlicer, adjust the settings as shown in the screenshots below.
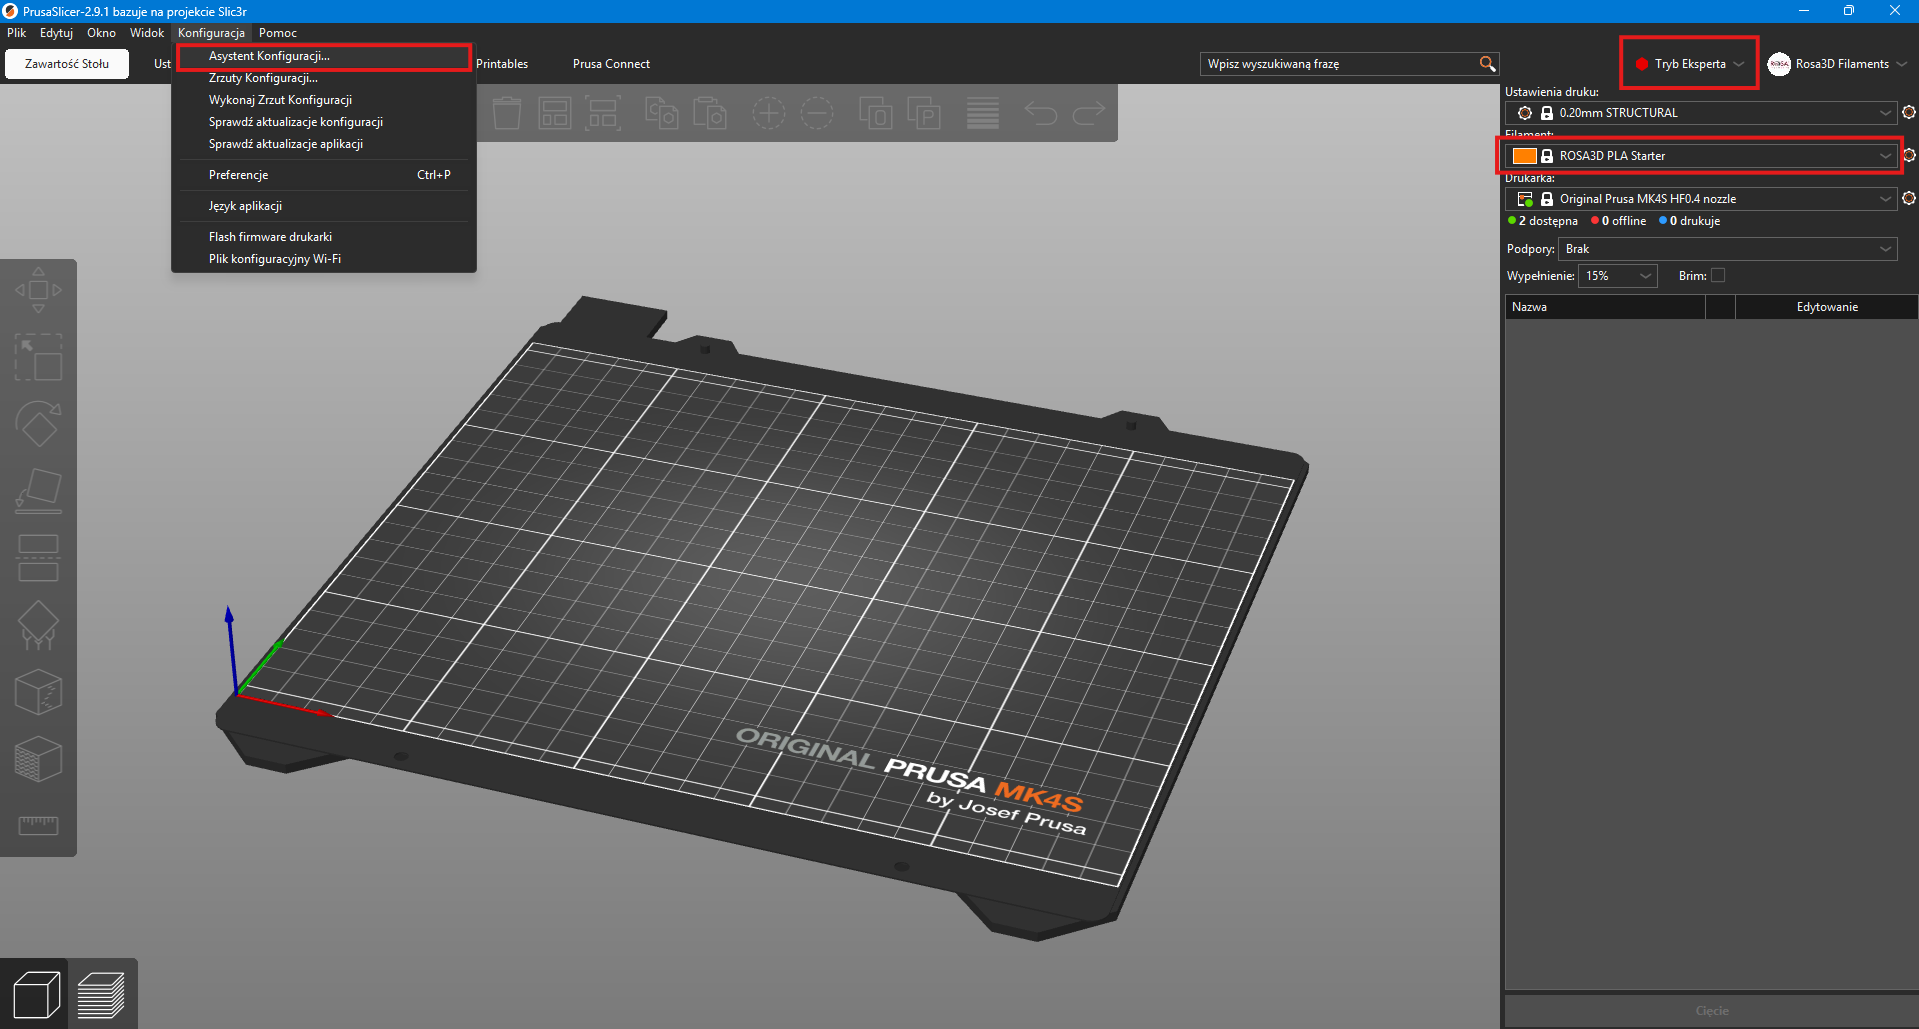
From the filament list, select the ROSA3D PLA Starter profile for PLA LW AERO or Generic Flex profile for TPU Flex LW. If it’s not available, add it using the Configuration wizard. Also, make sure to enable Expert mode.
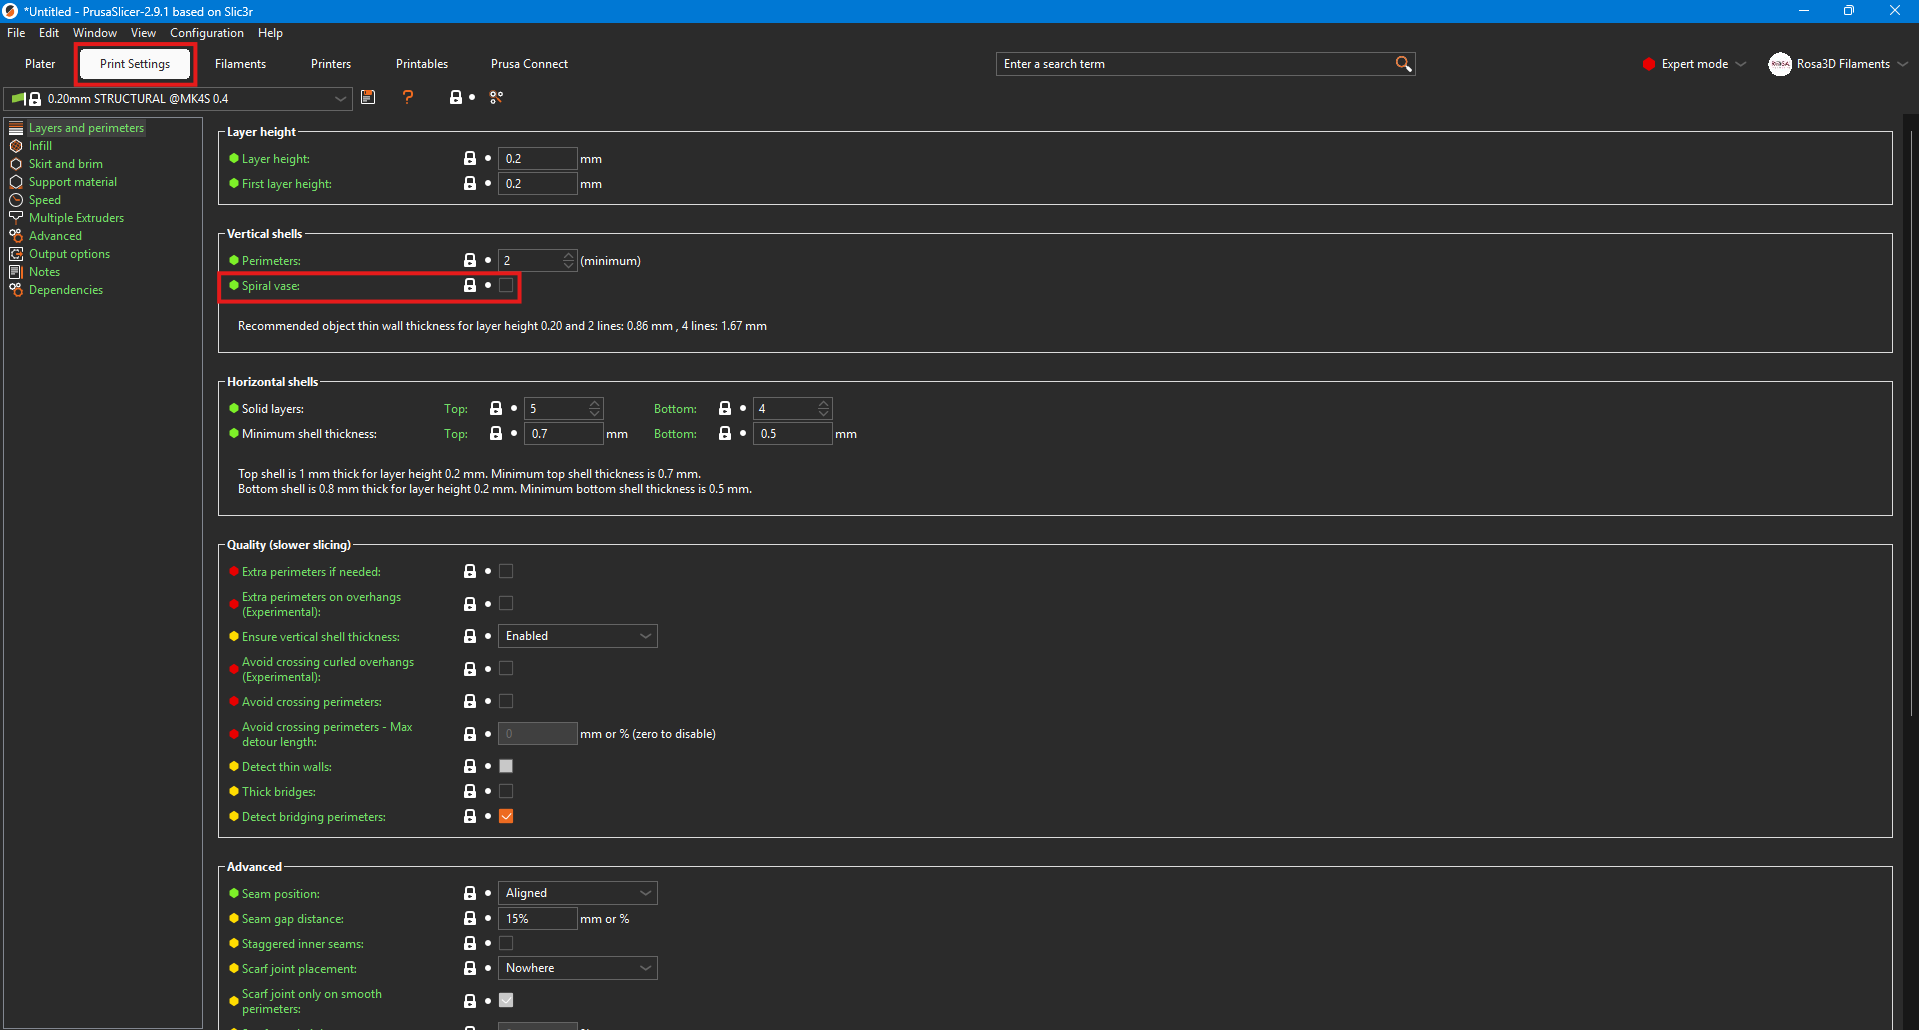
In the Print Settings tab, make sure to enable Spiral vase.
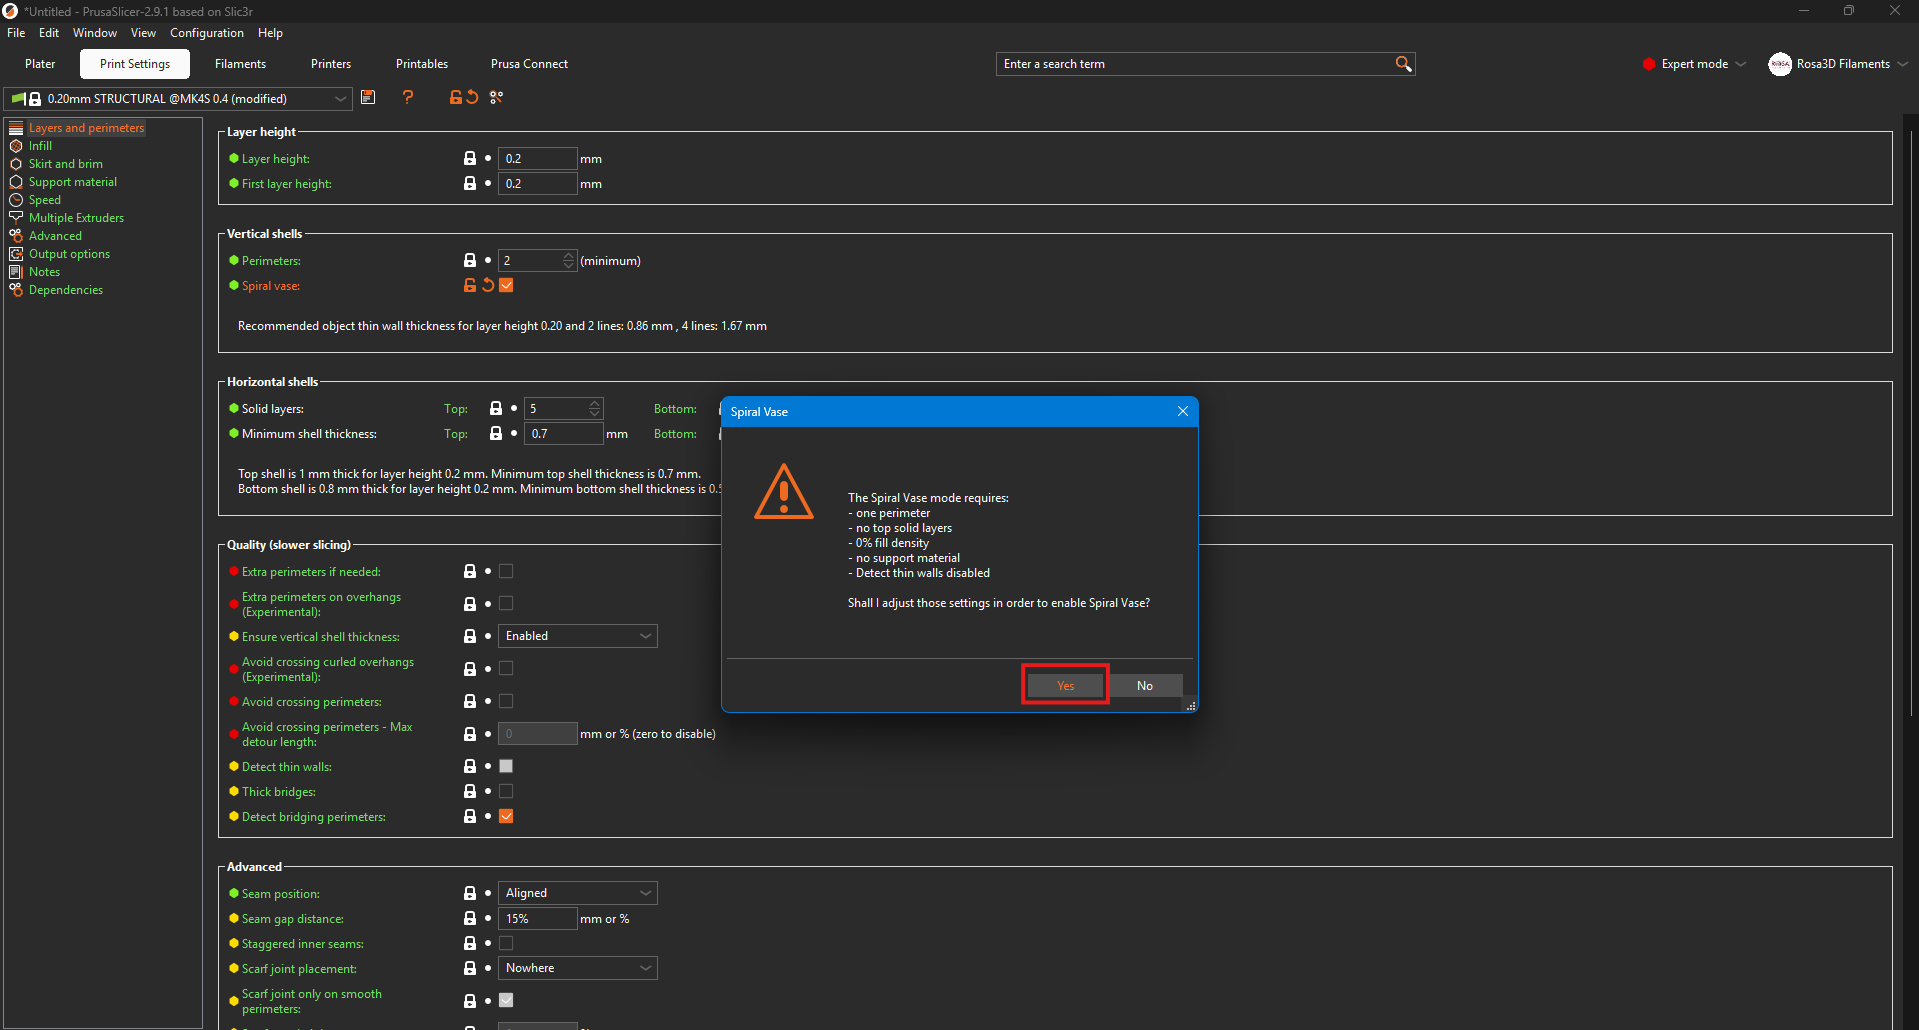
And confirm the changes.
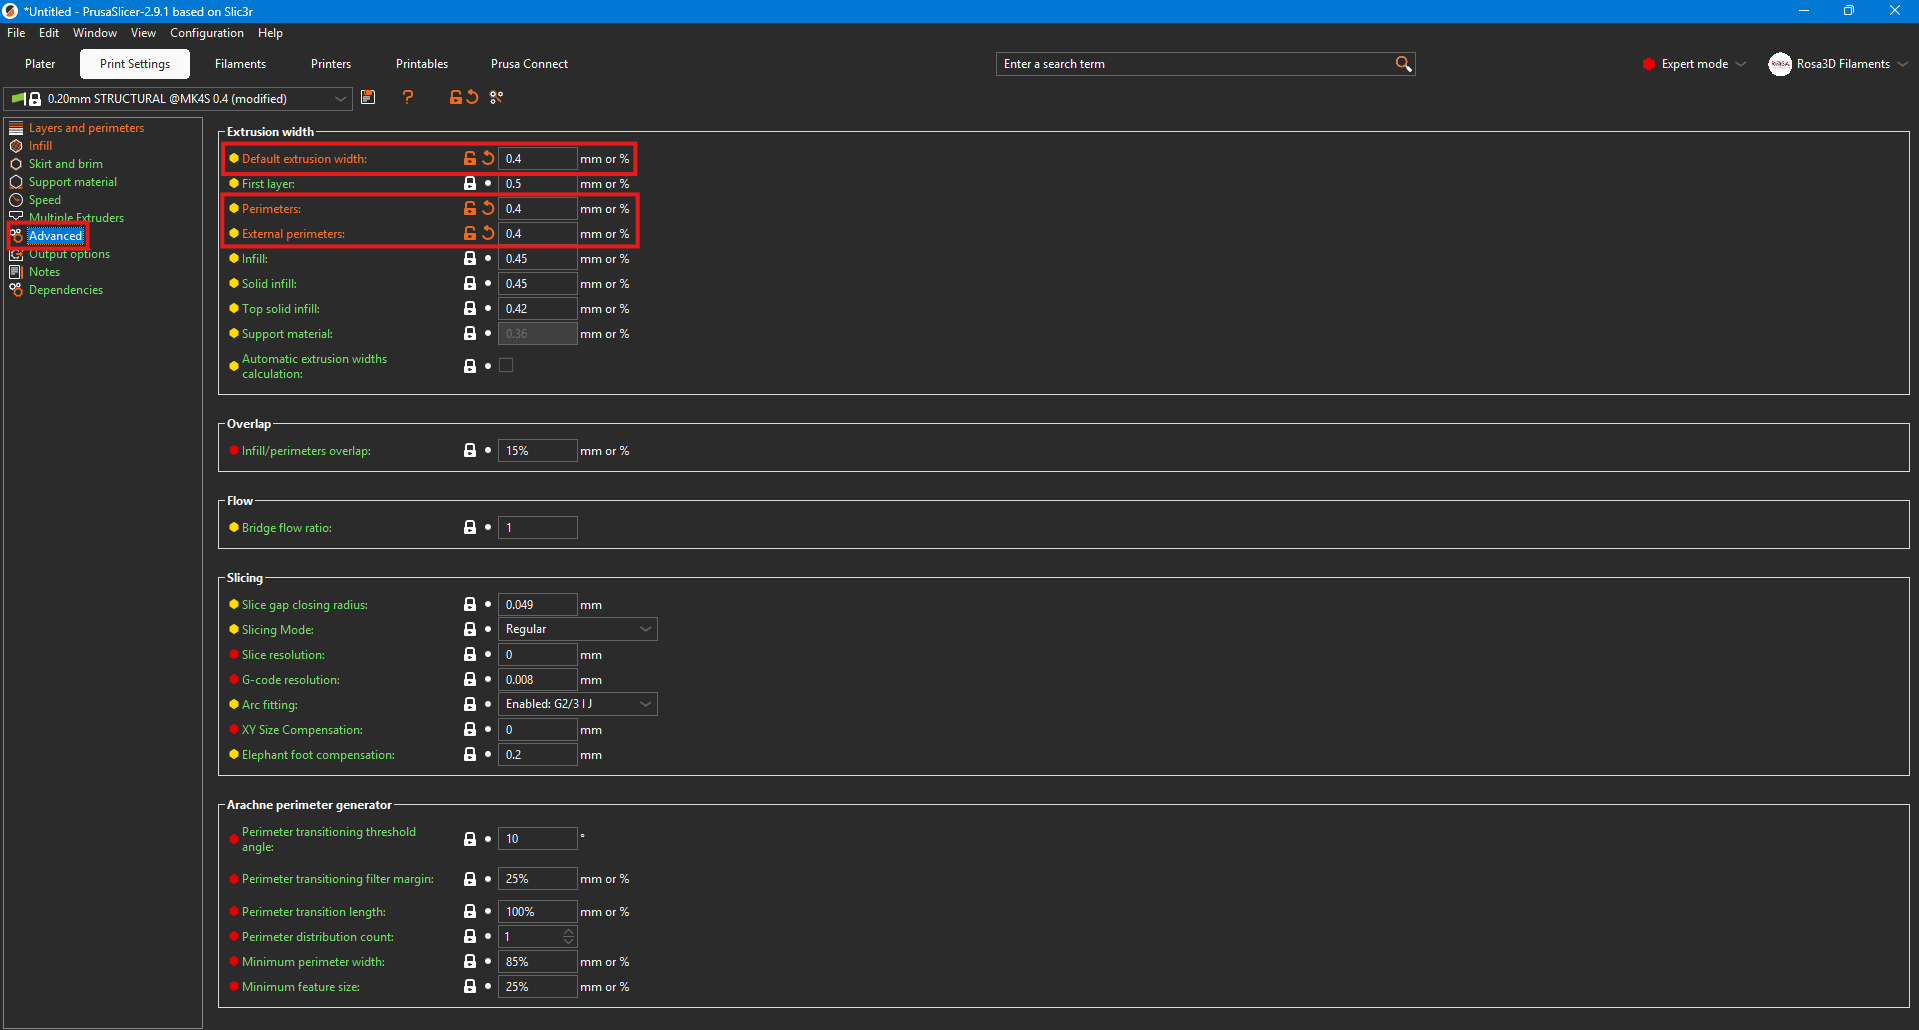
In the same tab, under the Advanced options, adjust the values according to the screenshot above.
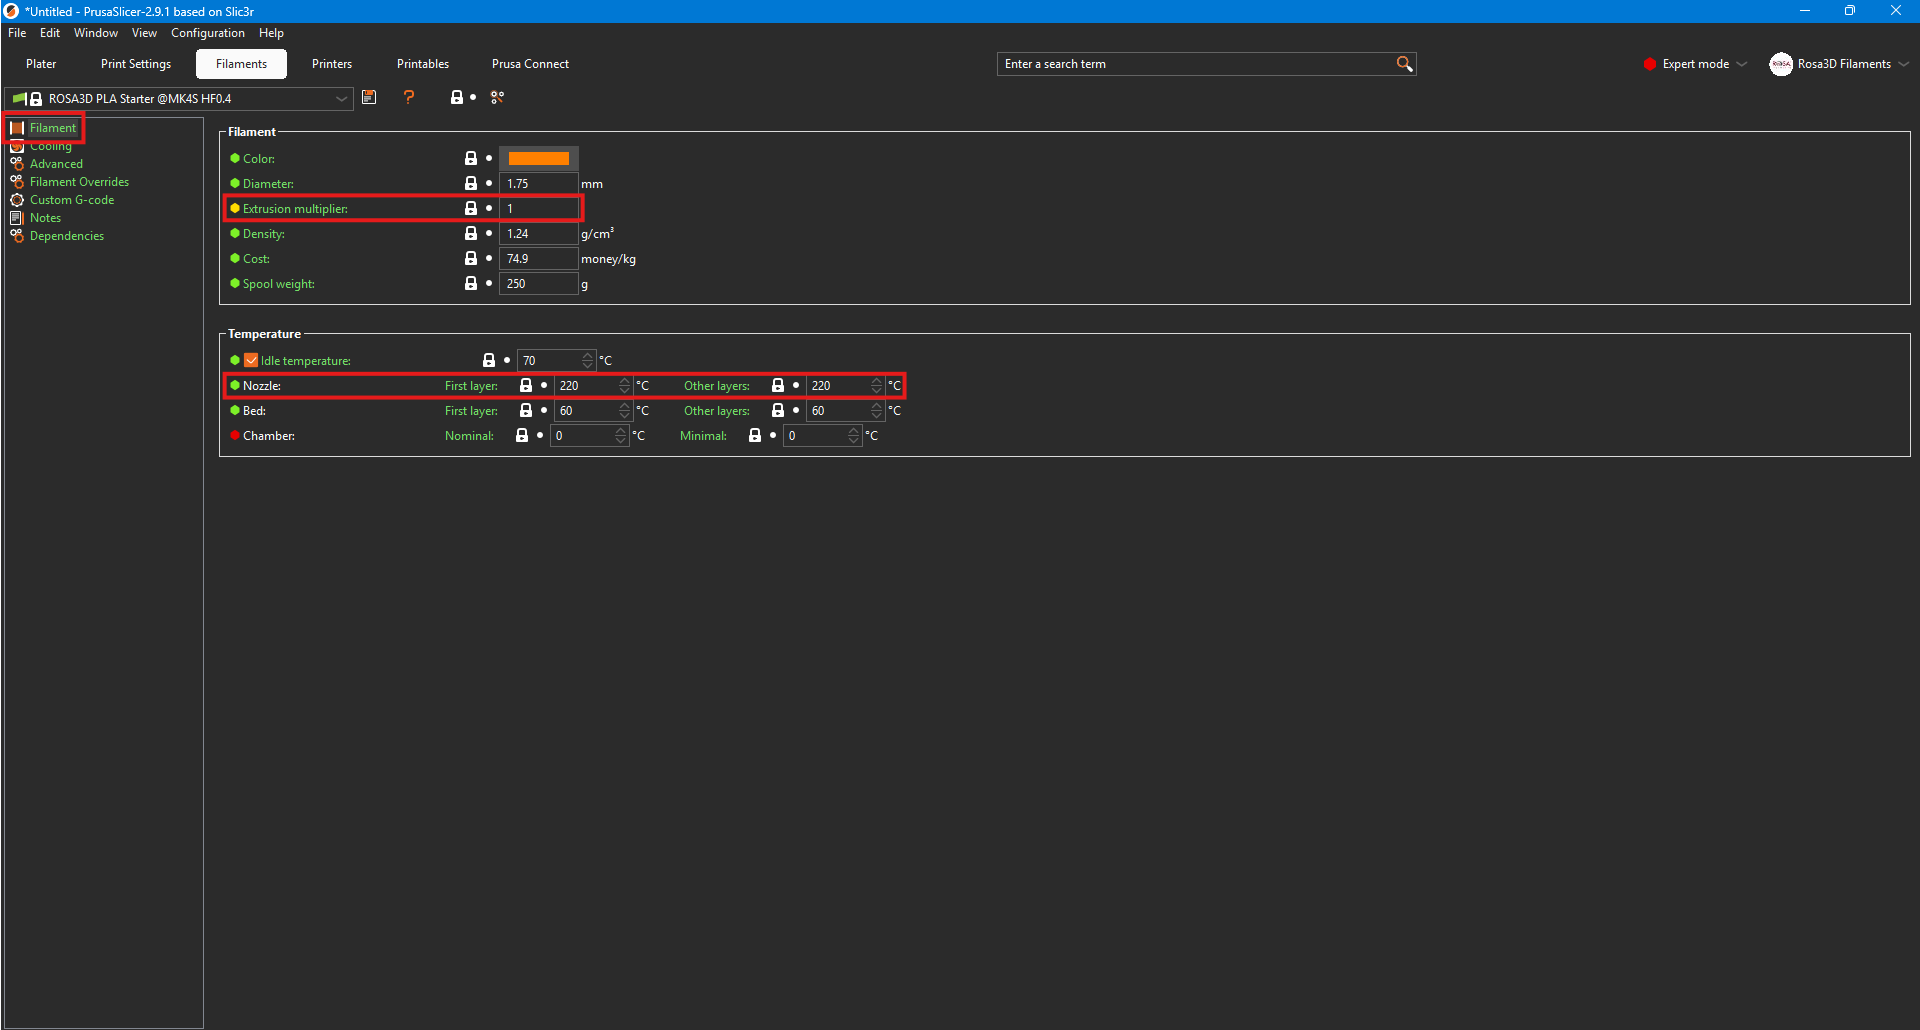
In the Filaments tab, pay attention to the values marked with rectangles. During calibration, the Extrusion multiplier should be set to 1. The temperature should be adjusted within the 220–260 °C range, depending on your needs.
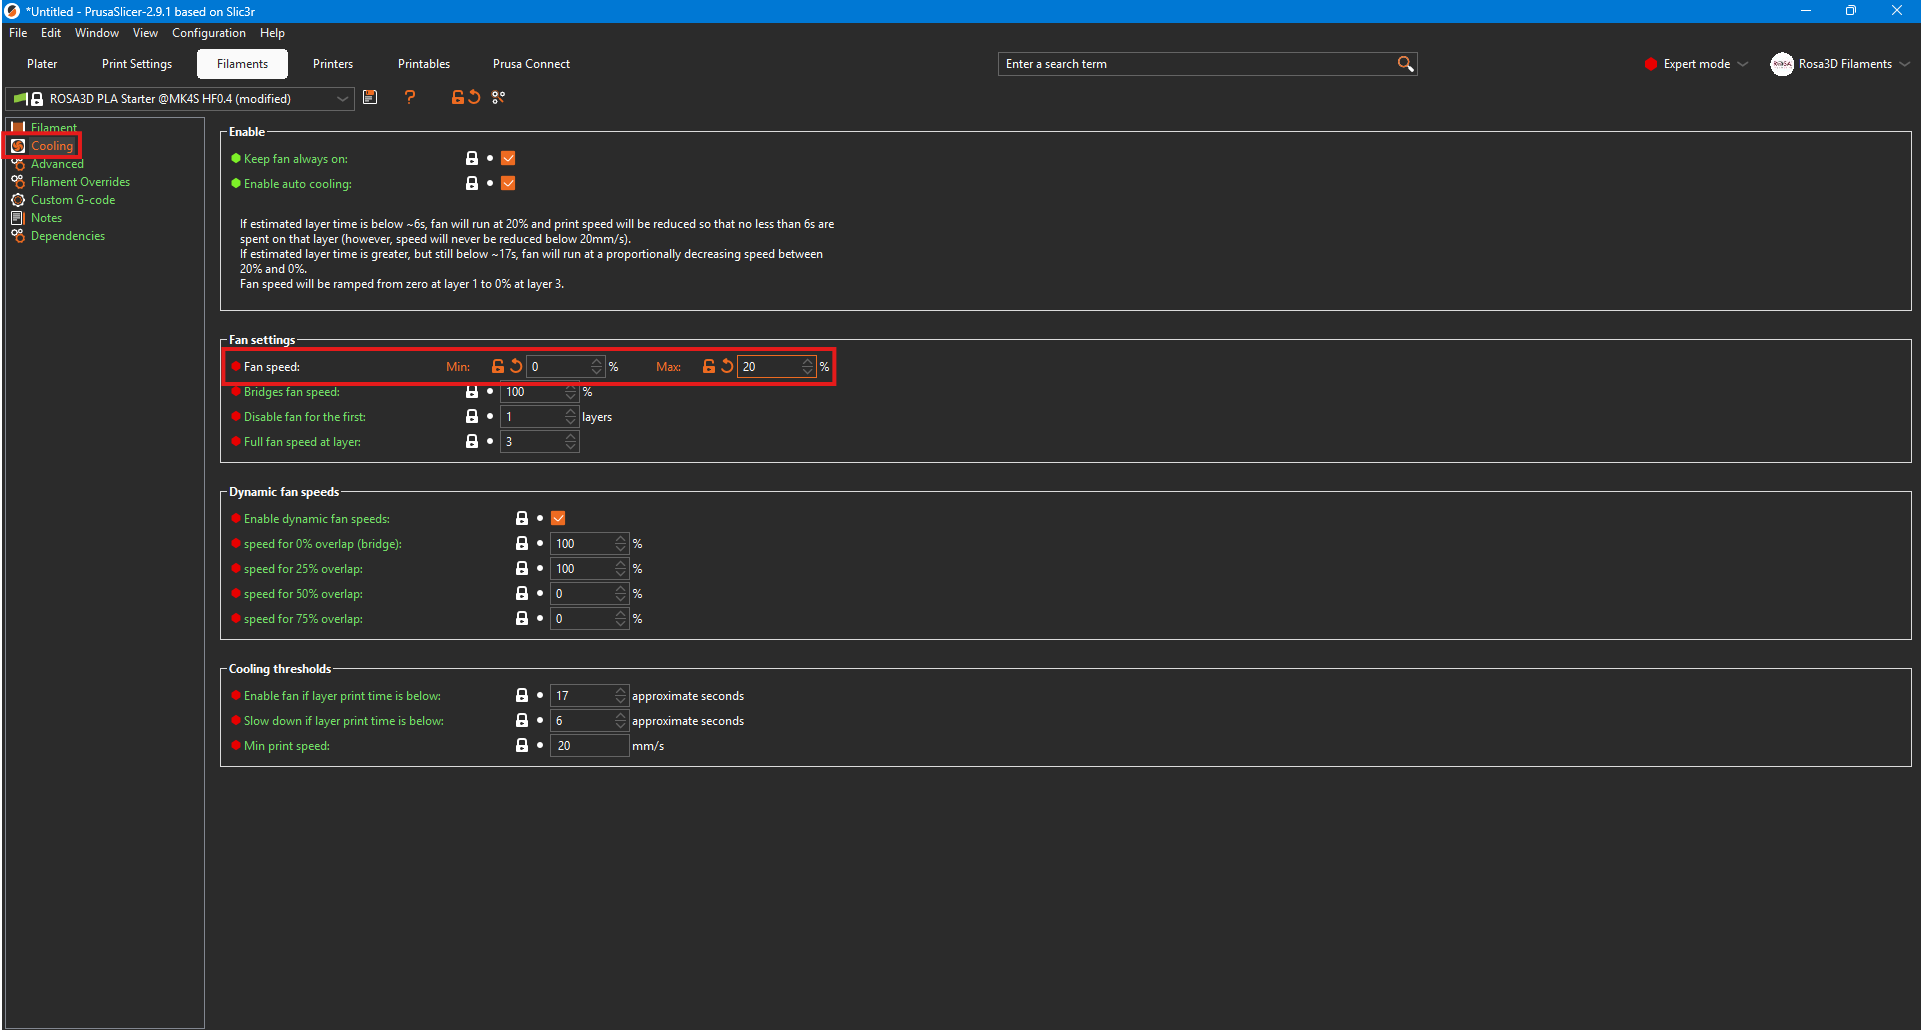
And adjust the fan speeds according to the screenshot above.
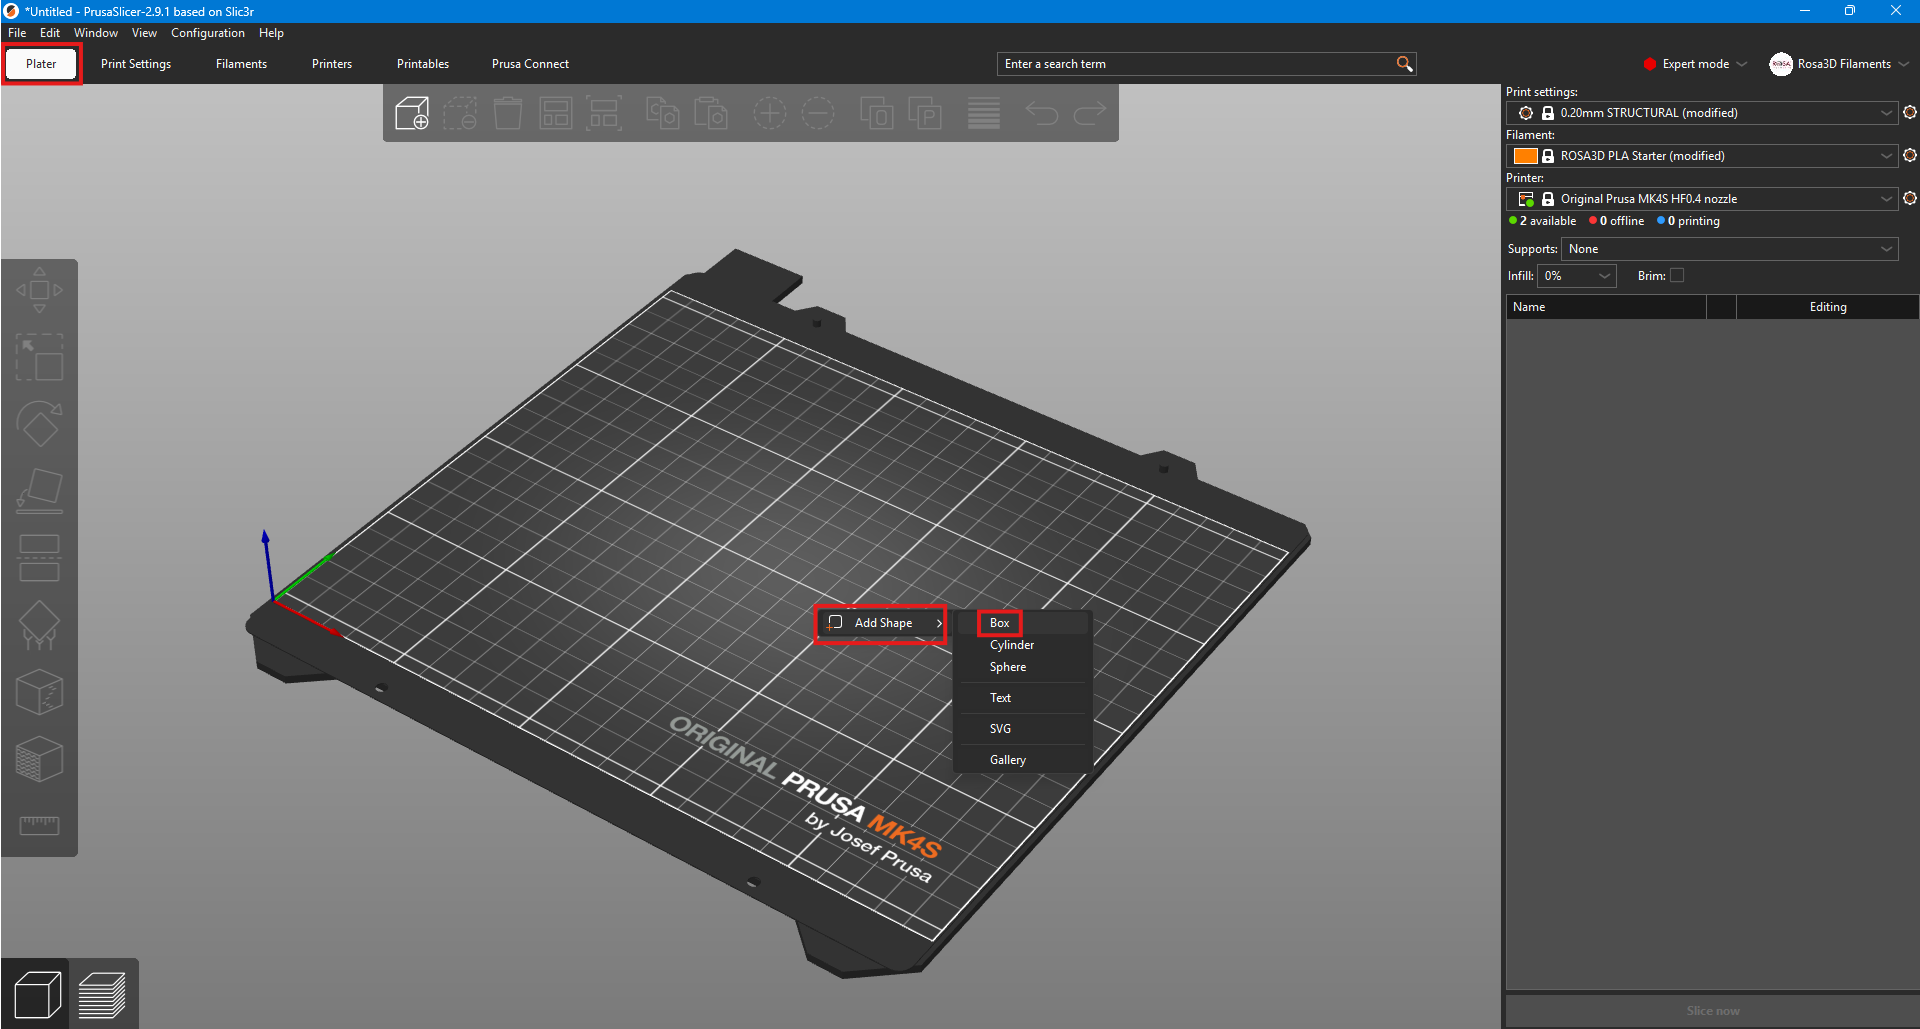
Next, go to the Plate tab, right-click on the empty area of the print bed, hover over
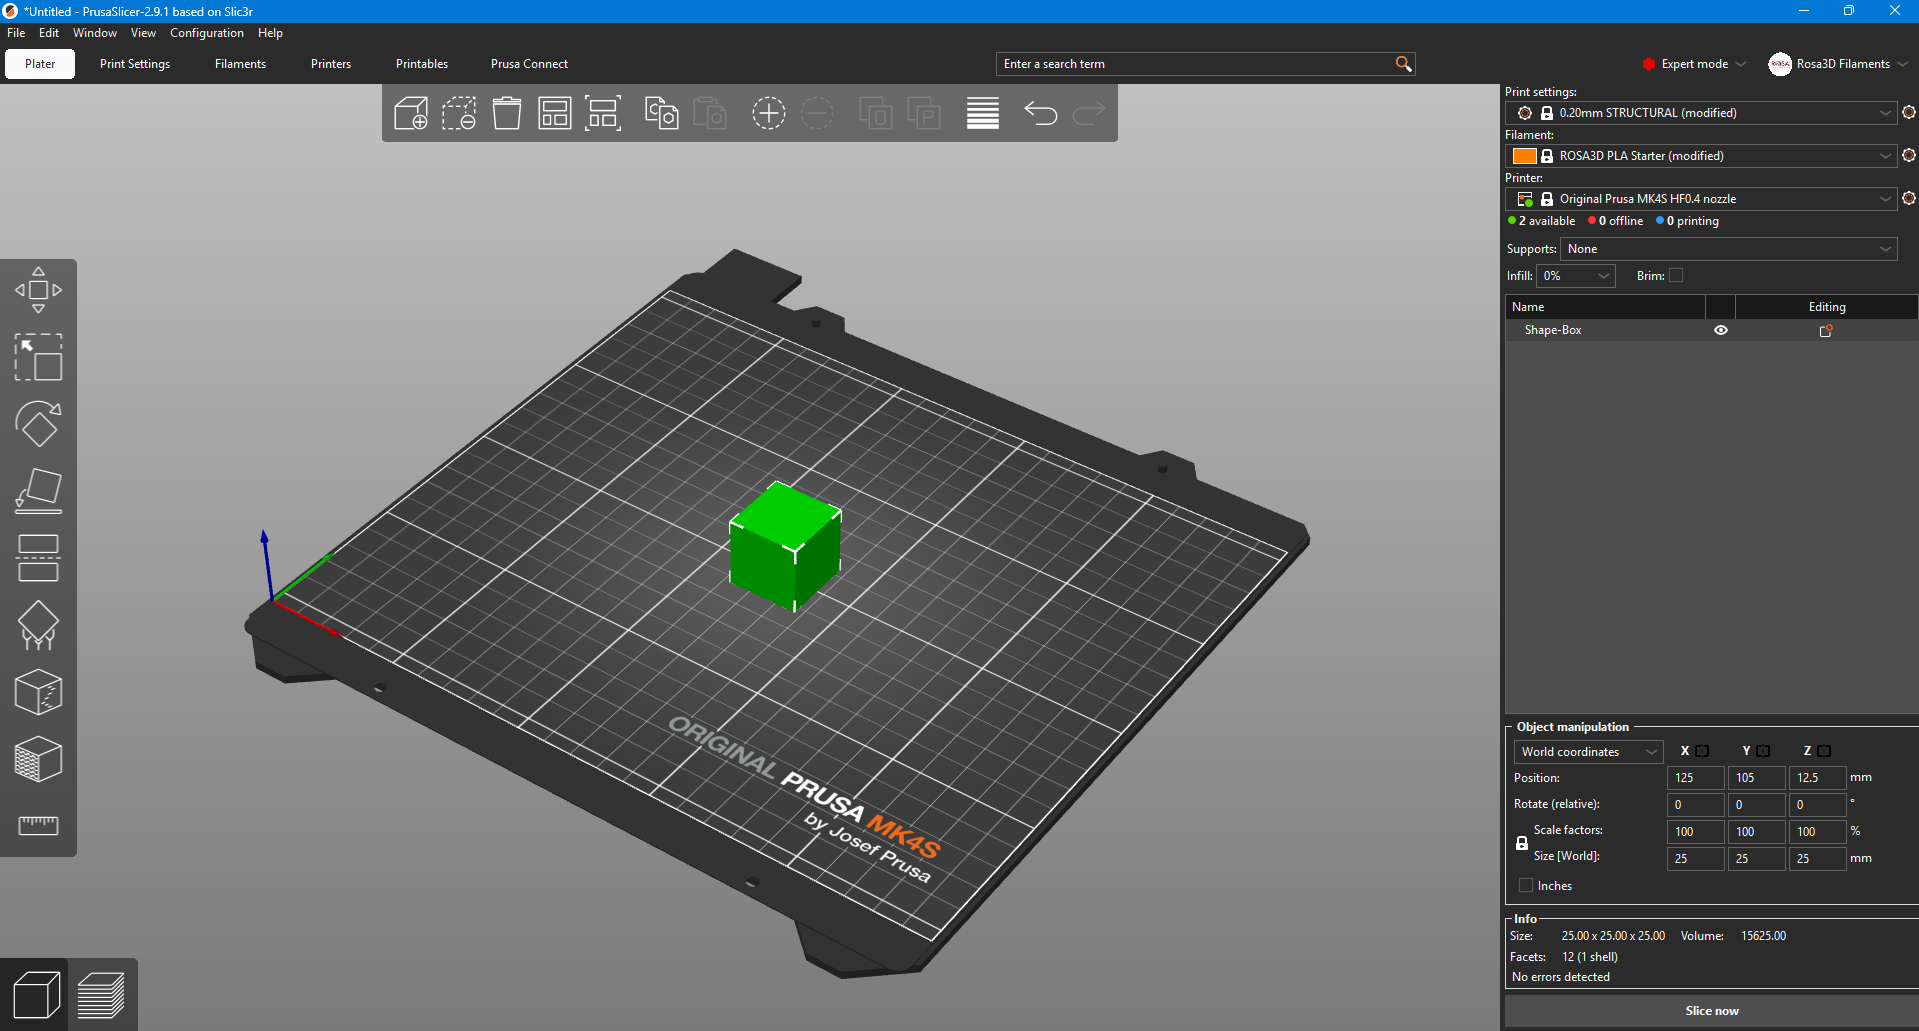
Once the file is prepared, it should be sliced and printed.
In BambuStudio, adjust the settings according to the screenshots provided below.
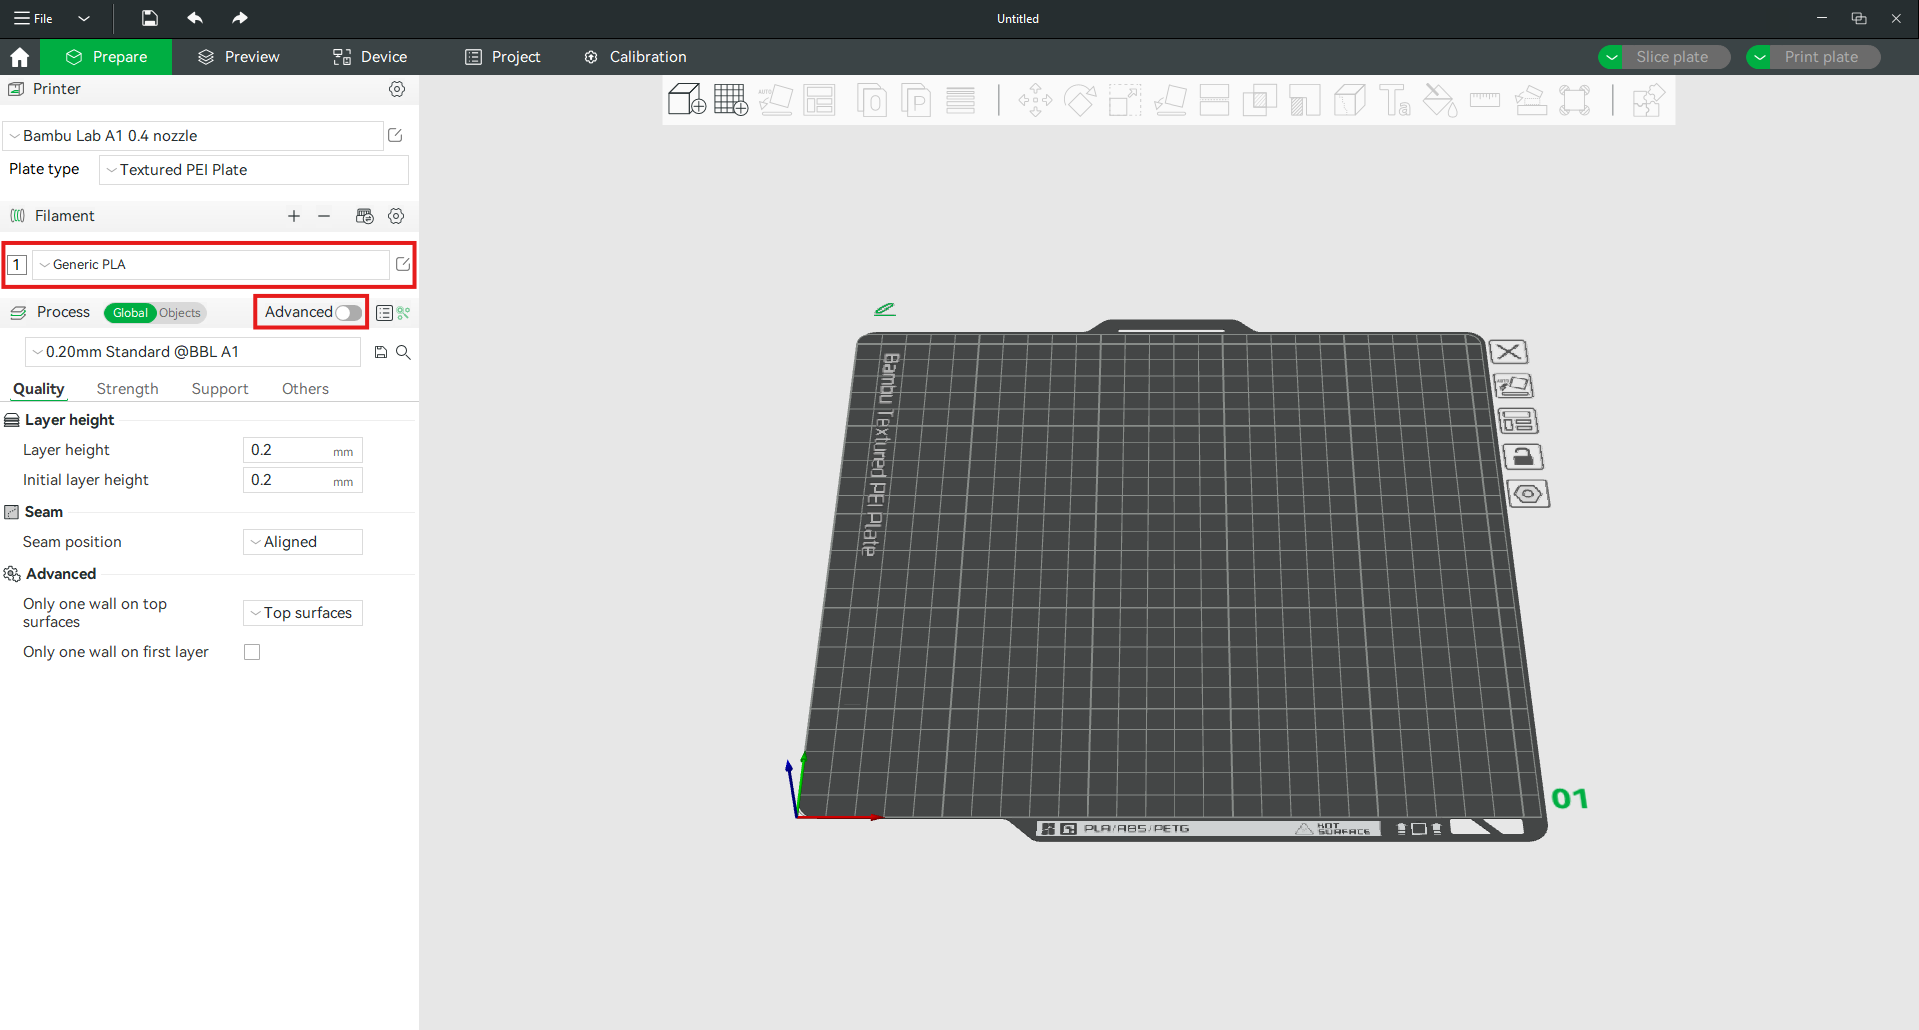
From the filament list, select the Generic PLA profile for PLA LW AERO or Generic TPU profile for TPU Flex LW and enable Advanced options.
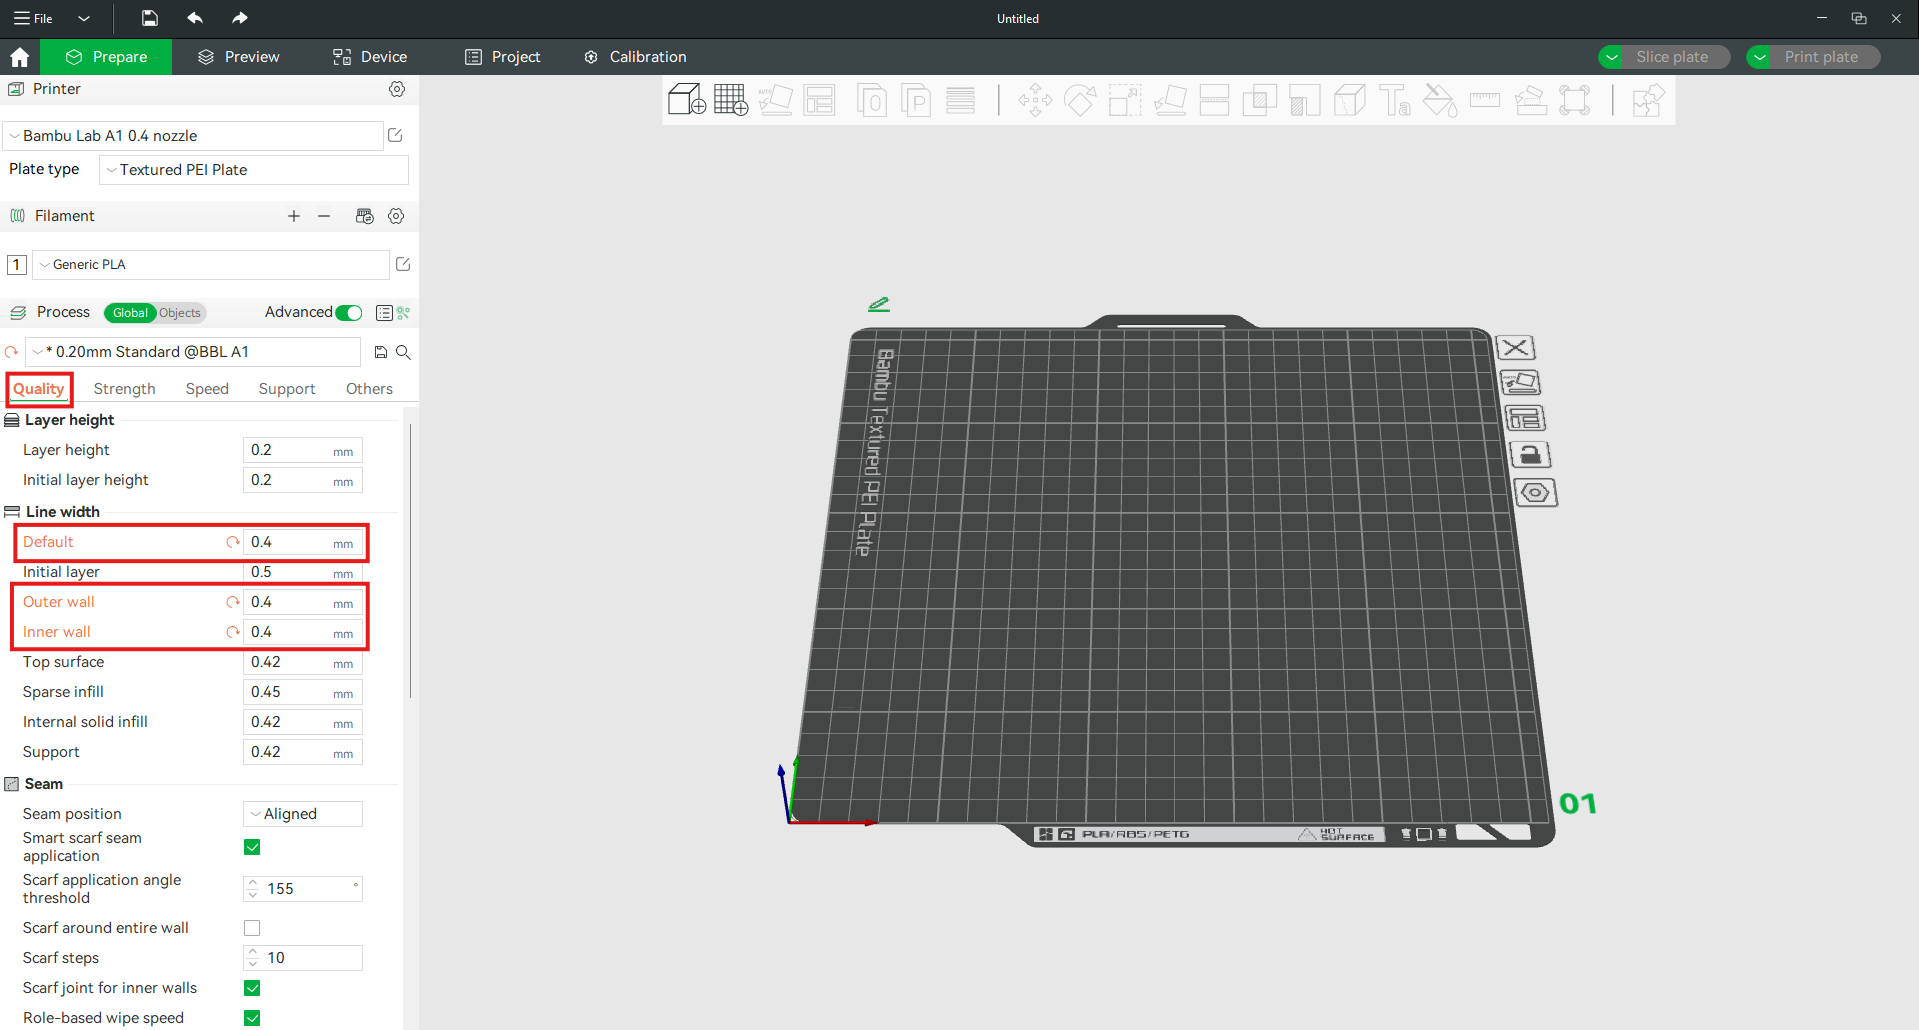
In the Quality tab, adjust the Line Width settings according to the screenshot above.
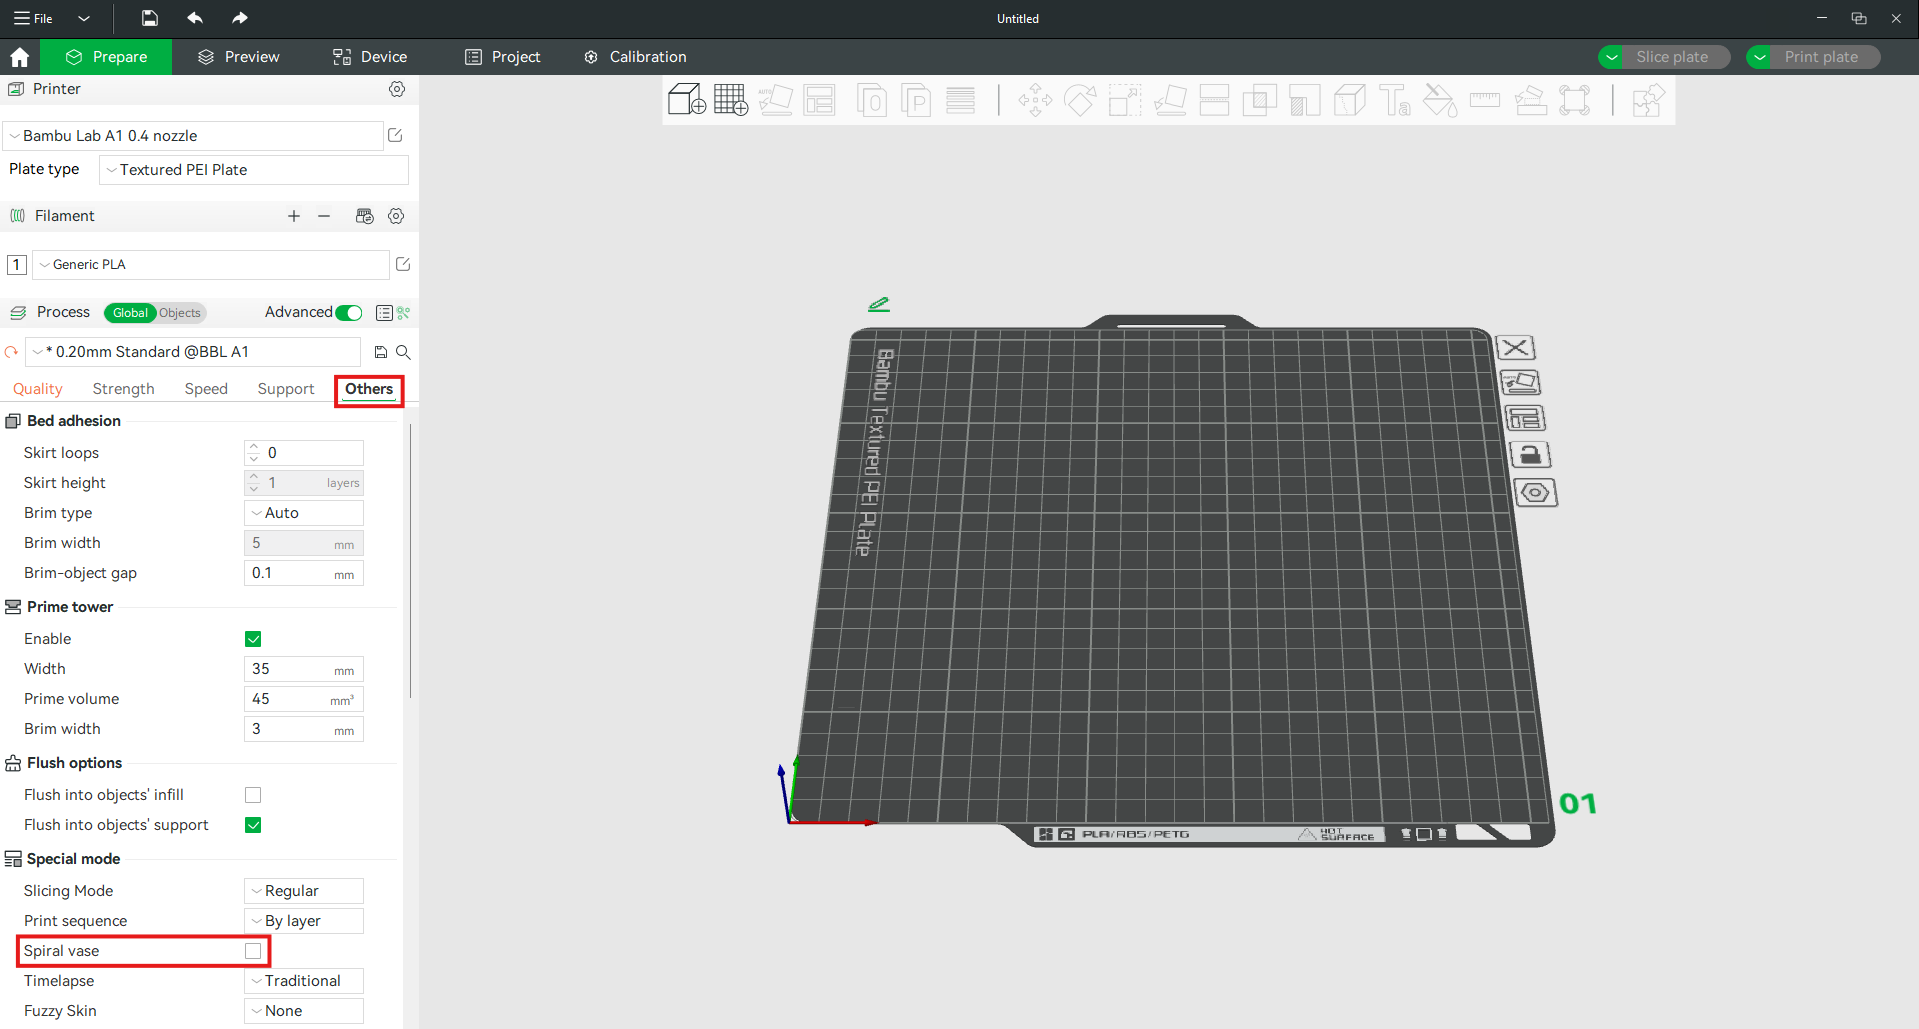
In the Others tab, enable Spiral vase.
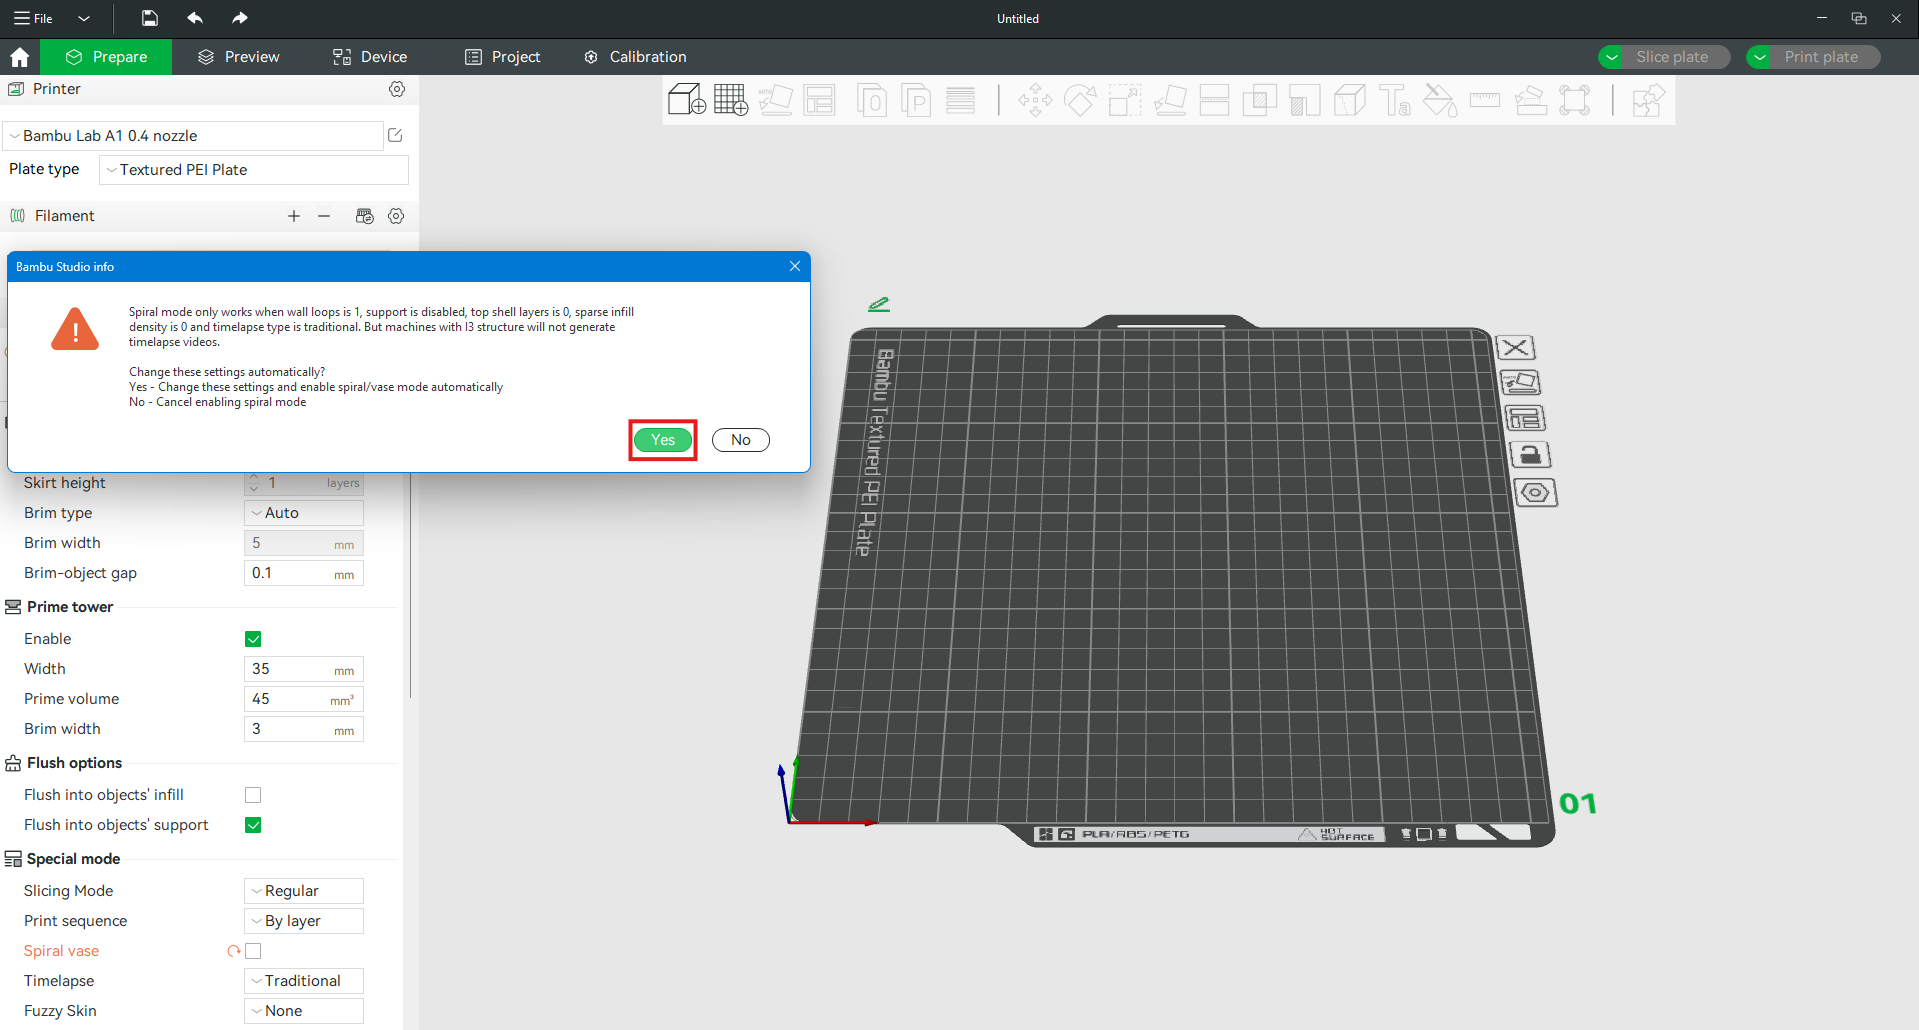
And confirm the changes.
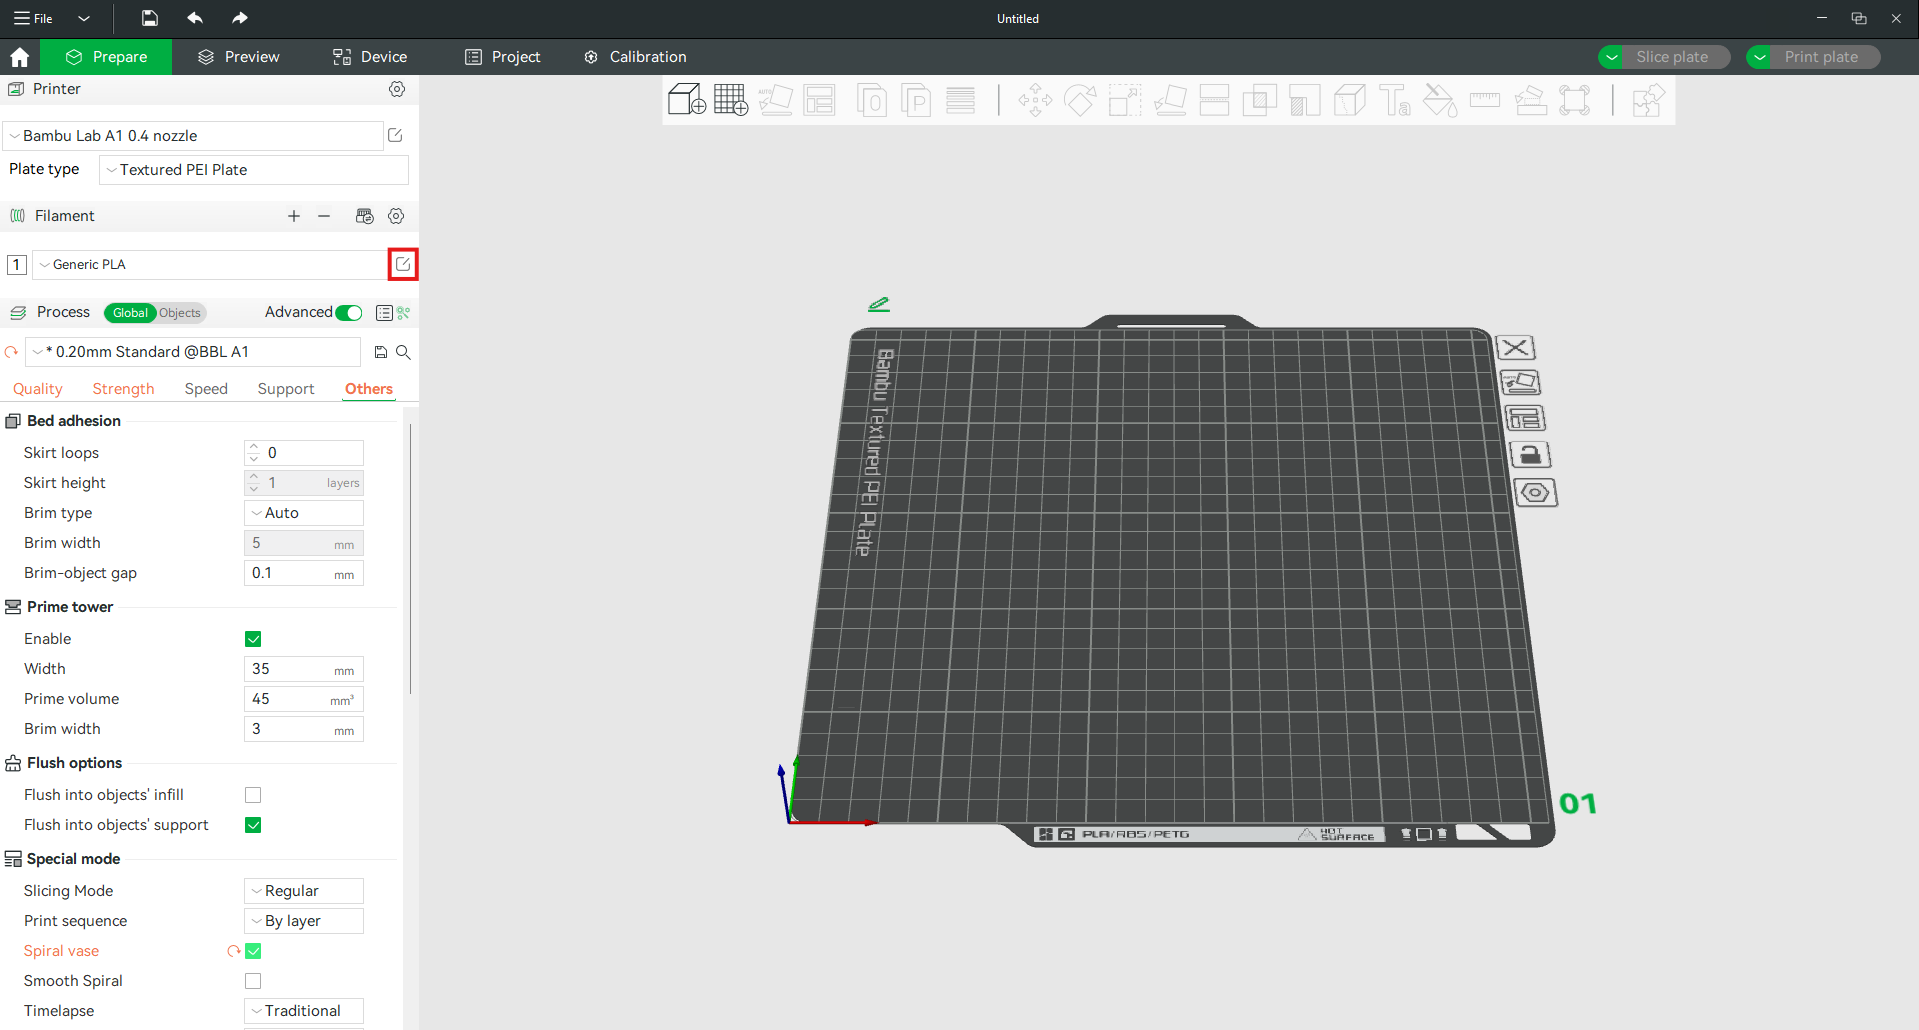
Next, you need to edit the filament settings.
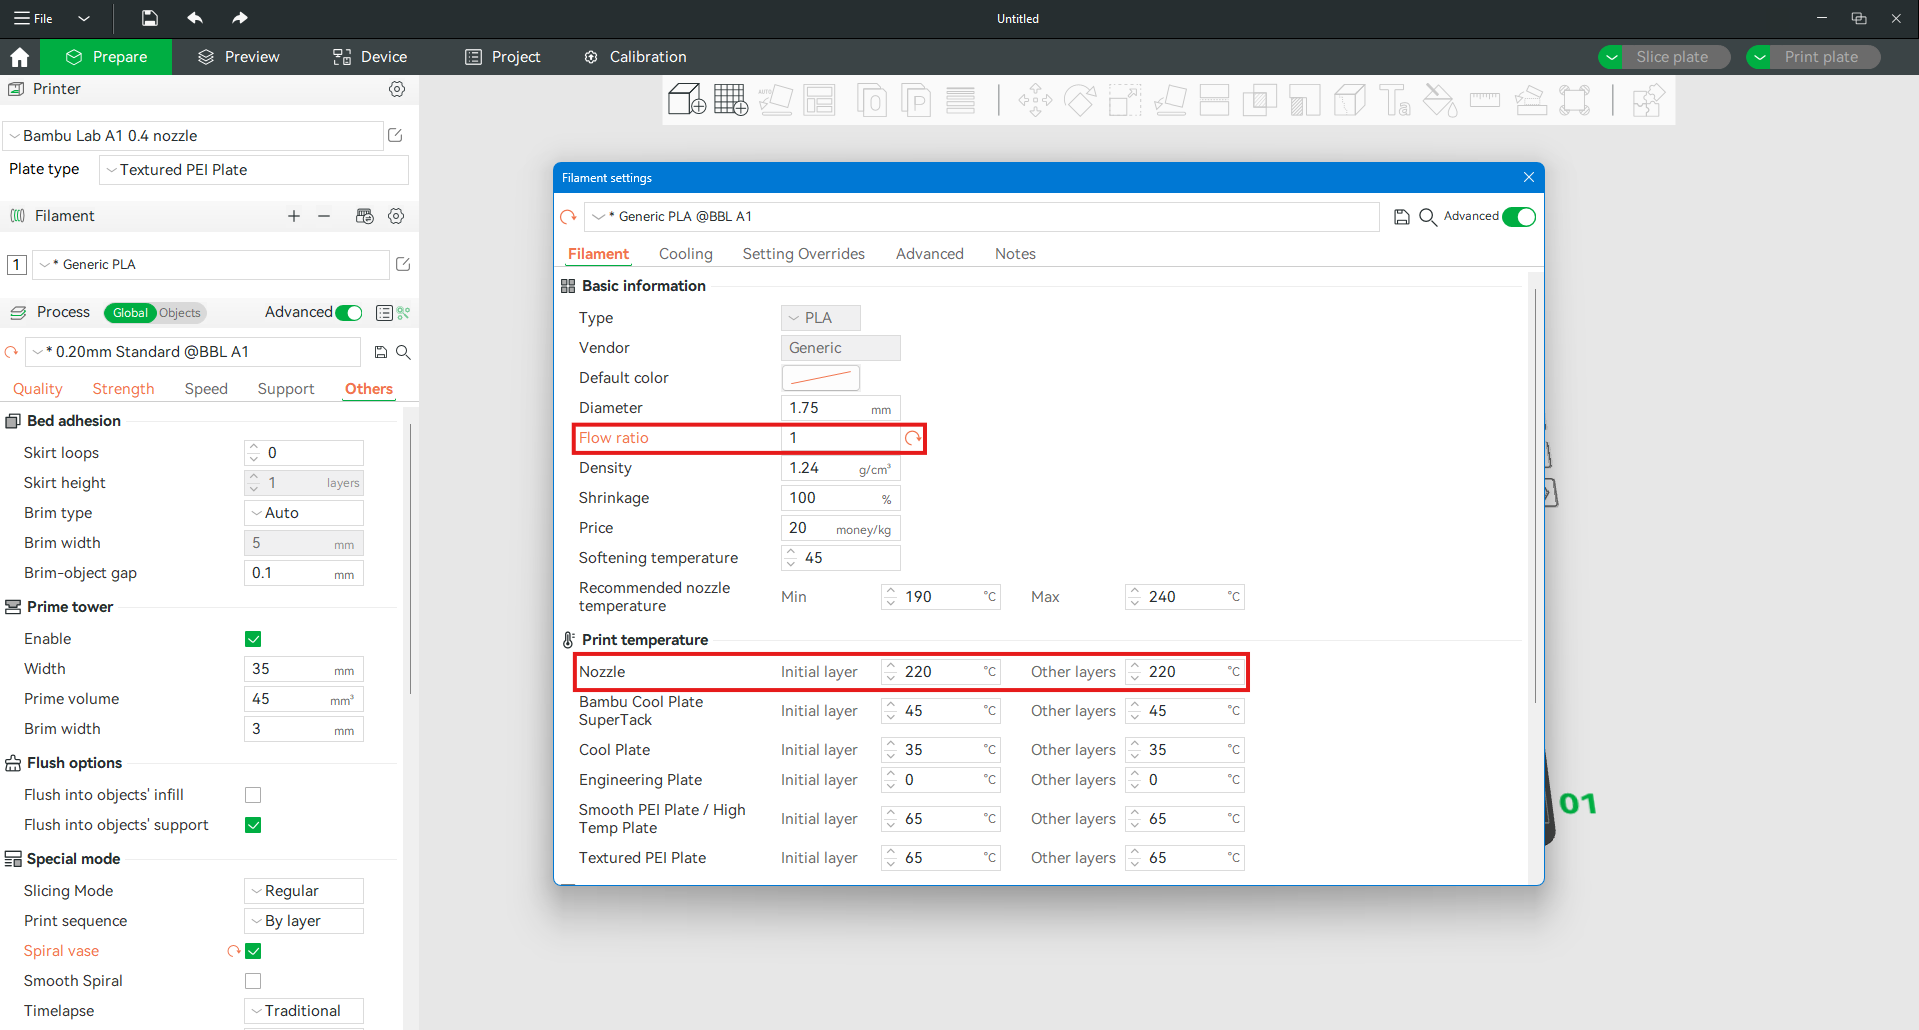
Pay attention to the Flow ratio — during calibration, it should be set to 1. The printing temperature should be adjusted within the range of 220–260°C, depending on your needs.
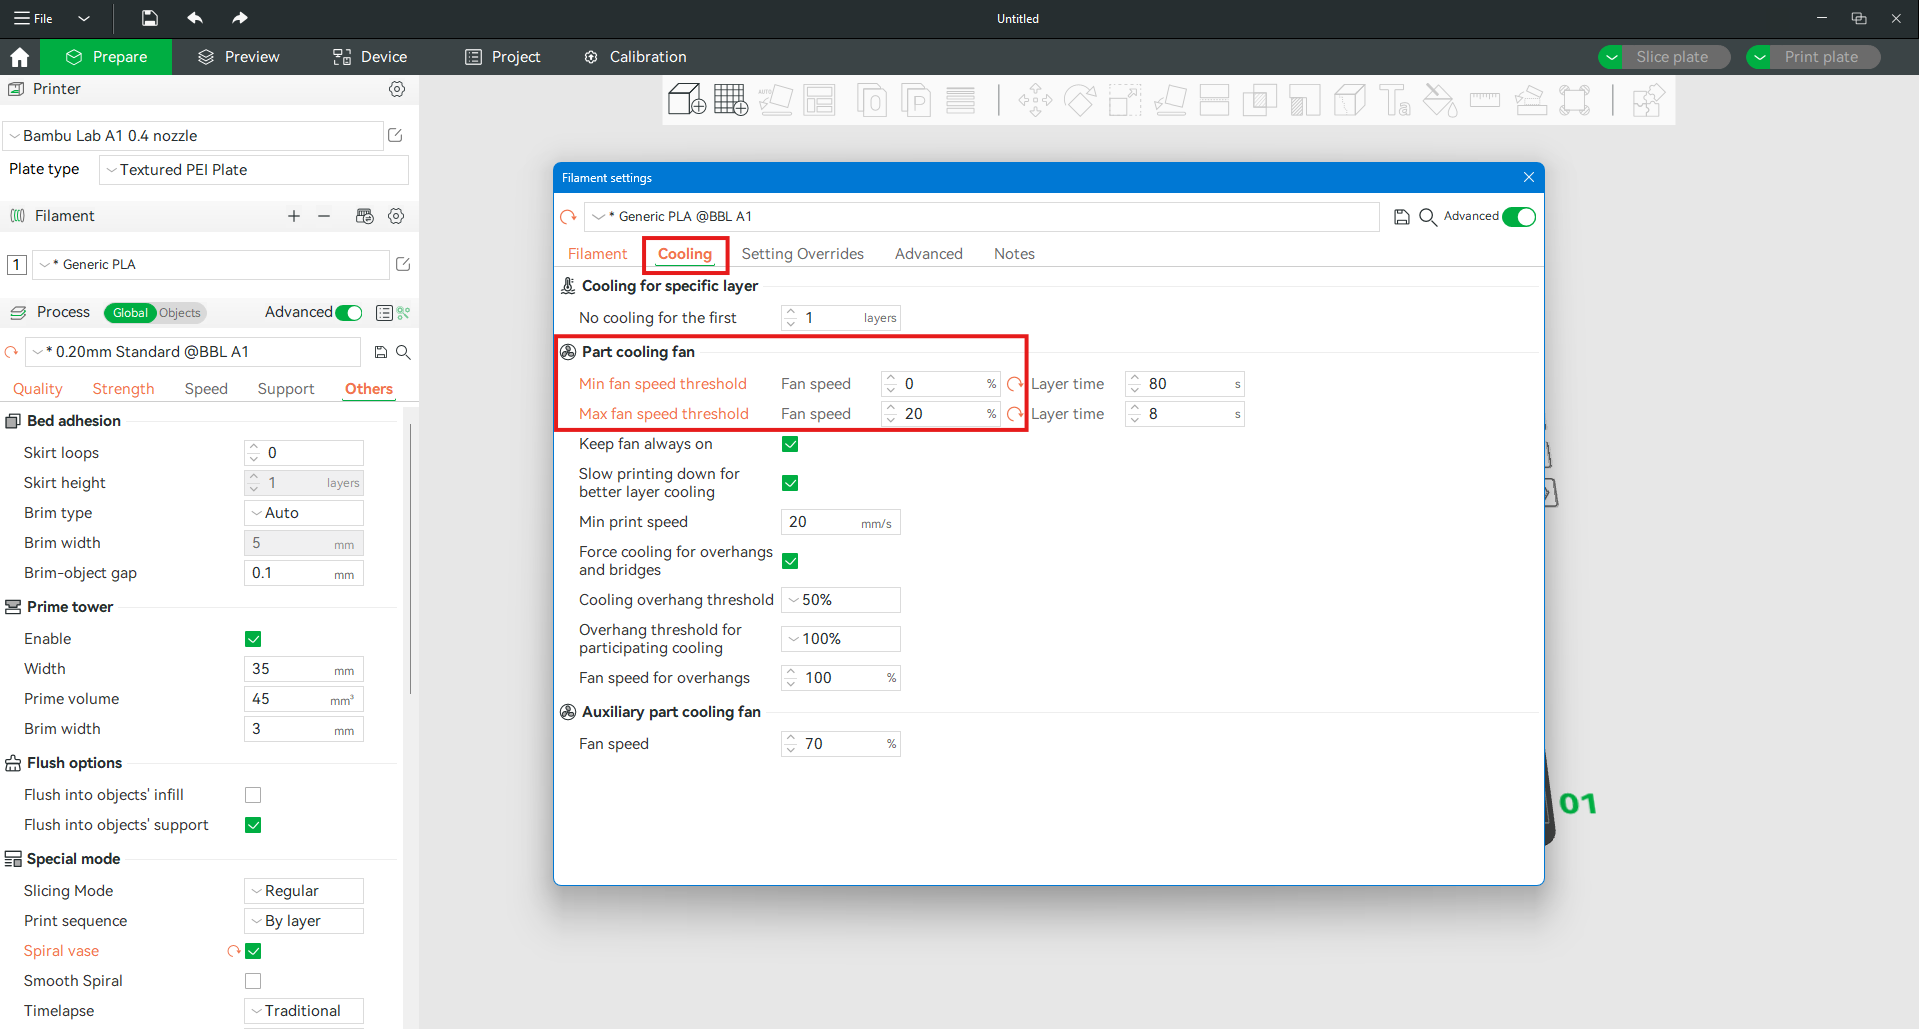
In the Cooling tab, adjust the settings according to the screenshot above, then close the filament settings window.
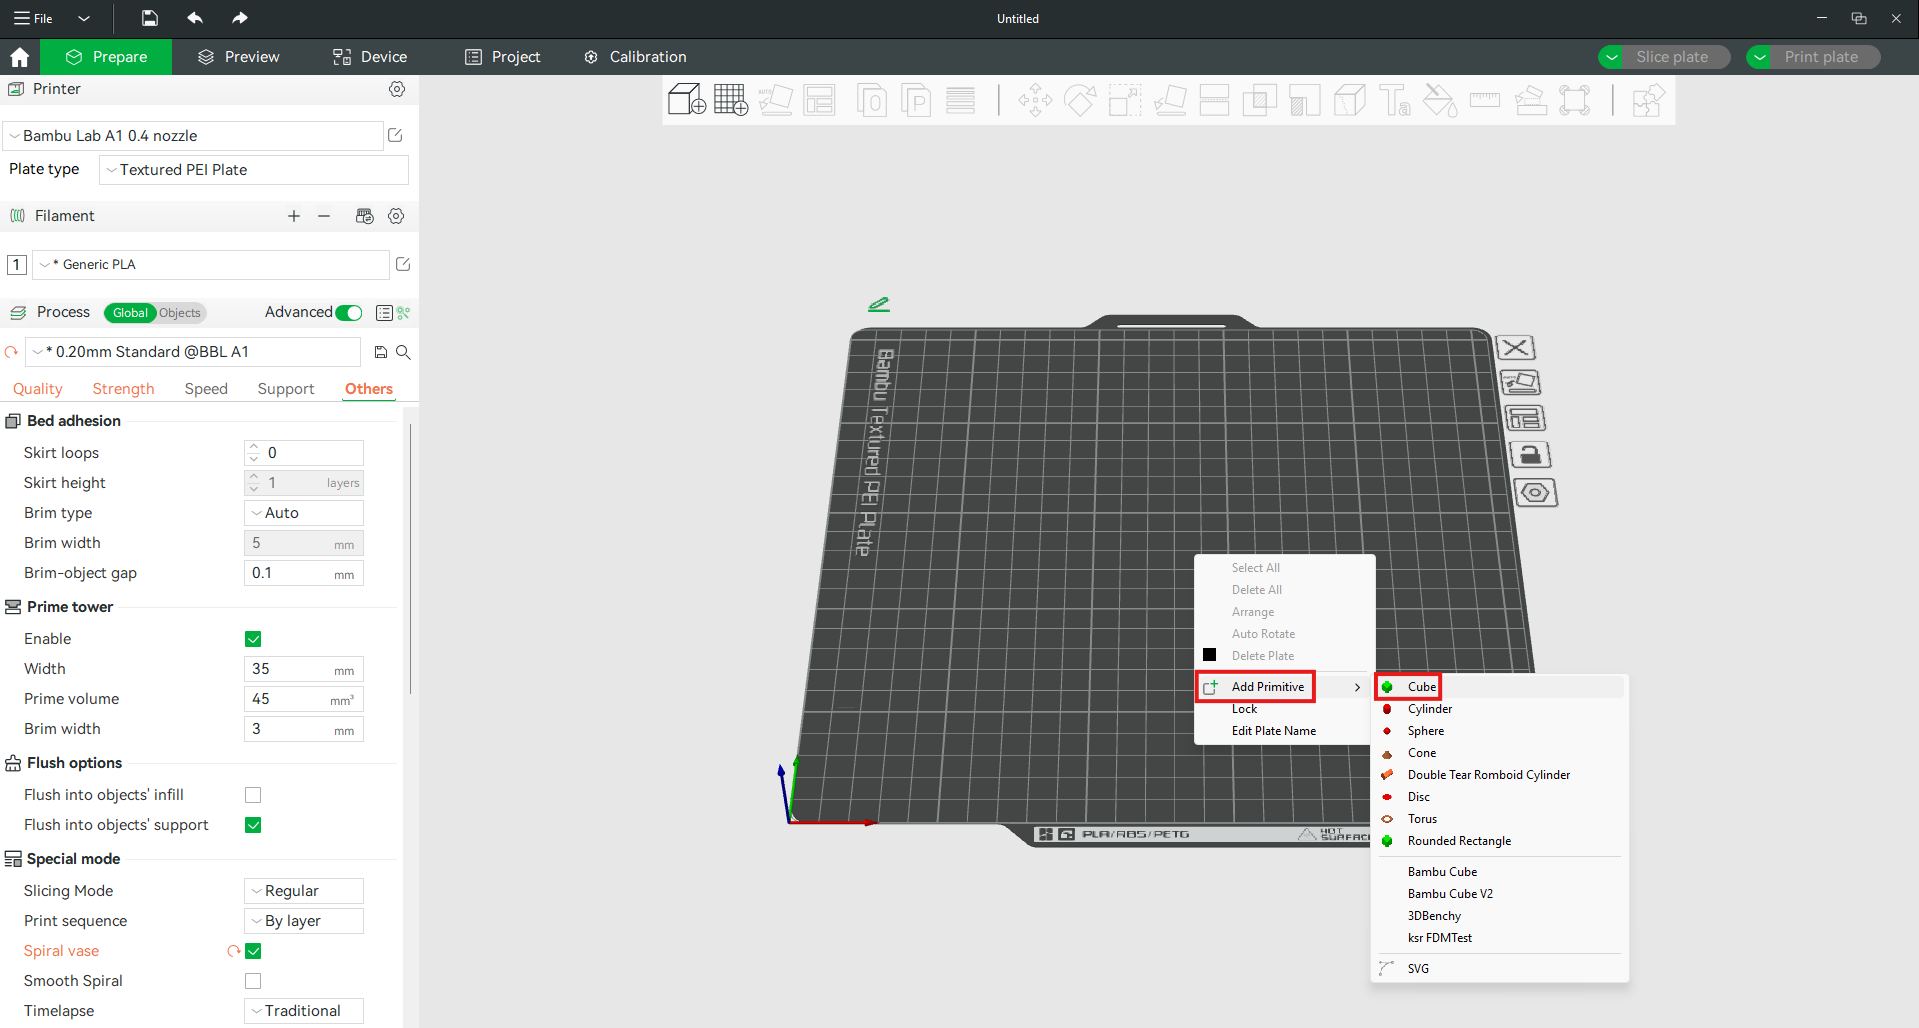
Next, right-click on an empty area of the printer bed, hover over Add Primitive, and select Cube.
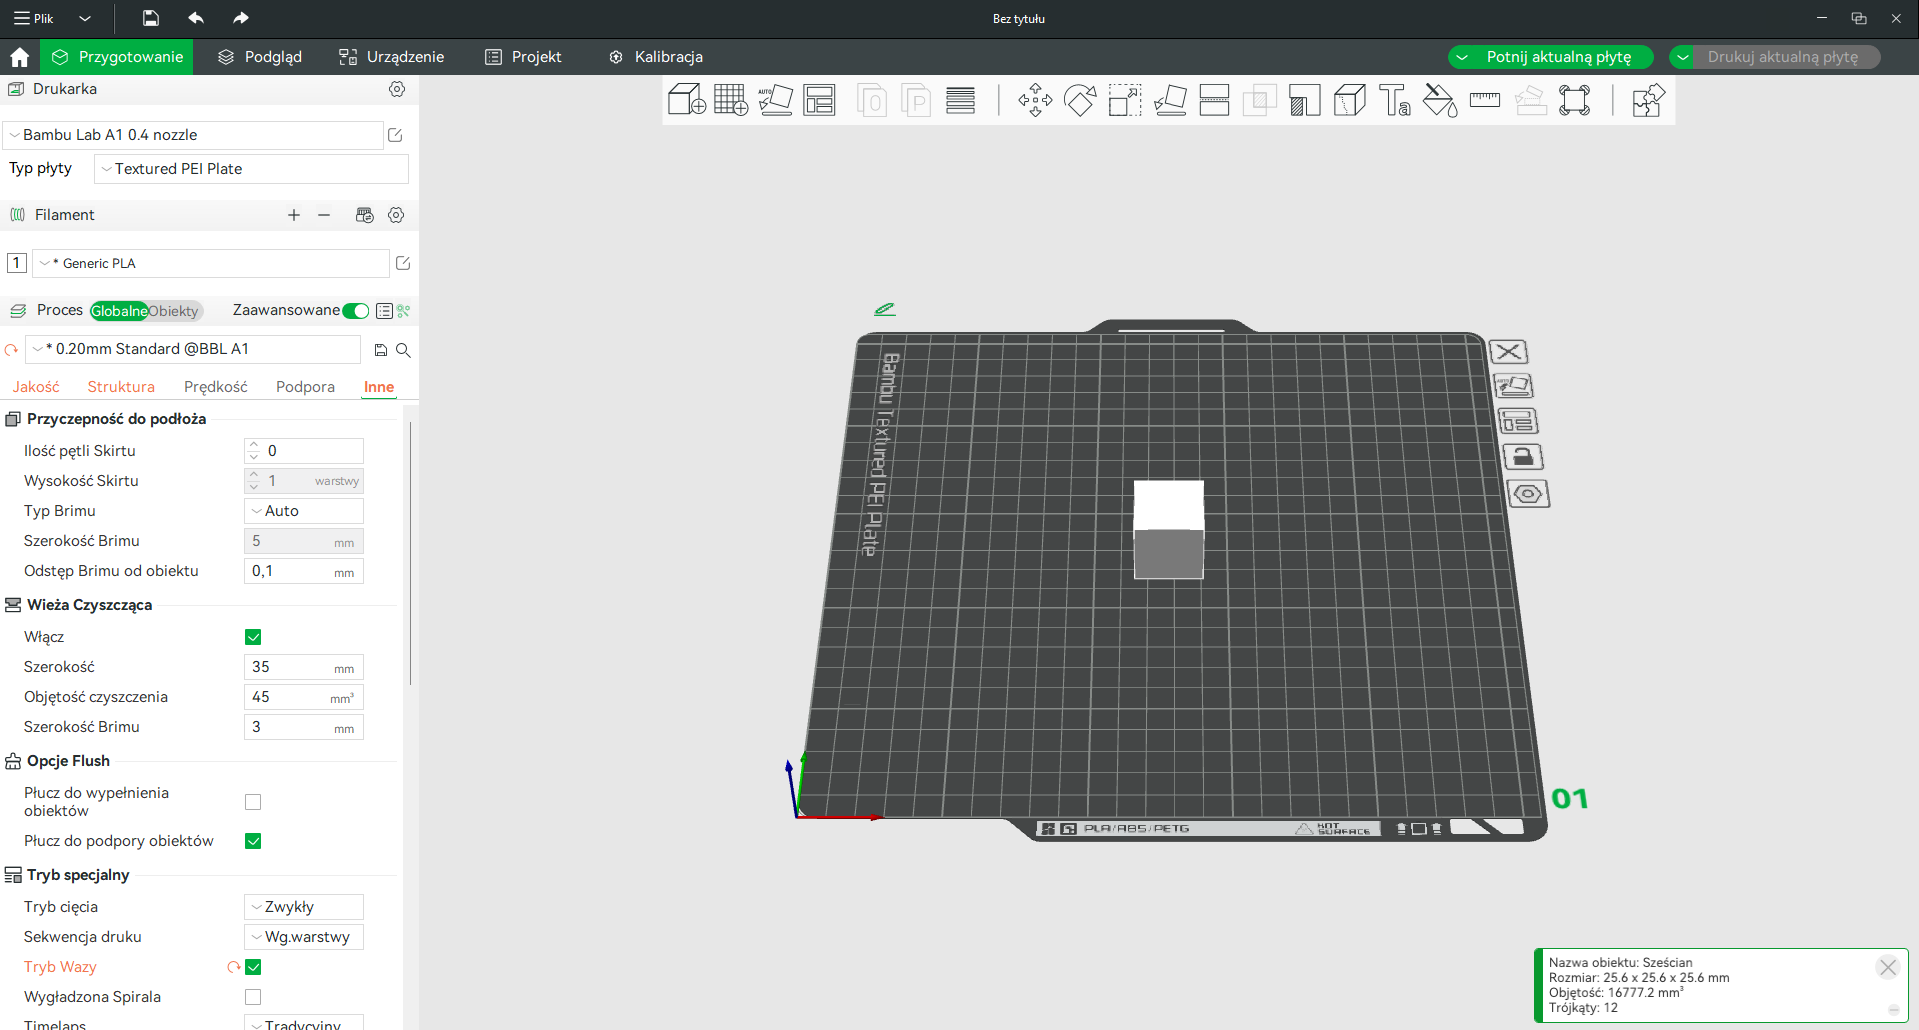
The prepared file should then be sliced and printed.
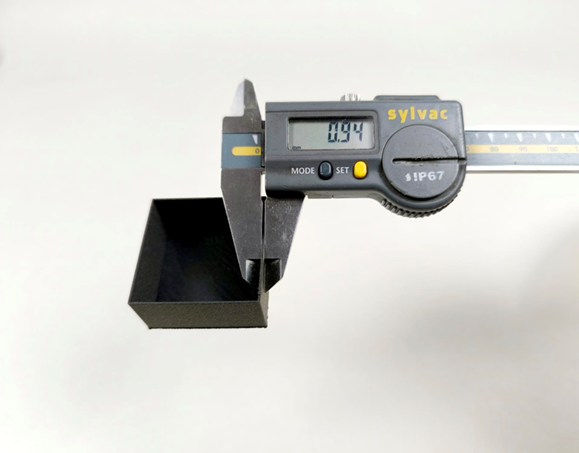
After printing, measure the wall thickness. To estimate the new extrusion multiplier, use the following simple formula:
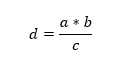
where:
a – extrusion multiplier used during the print
b – wall thickness set in the slicer
c – measured wall thickness
d – new extrusion multiplier
As an example, the new extrusion multiplier will be calculated based on the values from the previous image.
| Data | ||||
| a – extrusion multiplier during printing | 1 | |||
|---|---|---|---|---|
| b – set wall thickness | 0.4 | |||
| c – measured wall thickness | 0.94 | |||
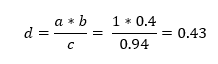
The new extrusion multiplier is 0.43. This is a theoretical value and should be verified during actual printing.
ROSA PLAST SP. z o.o.
ul. Hipolitowska 102B
05-074 Hipolitów, POLAND
Email
eshop@rosa3d.pl
Our team is at your disposal on working days during the hours:
od 7:00 do 15:00
Follow us